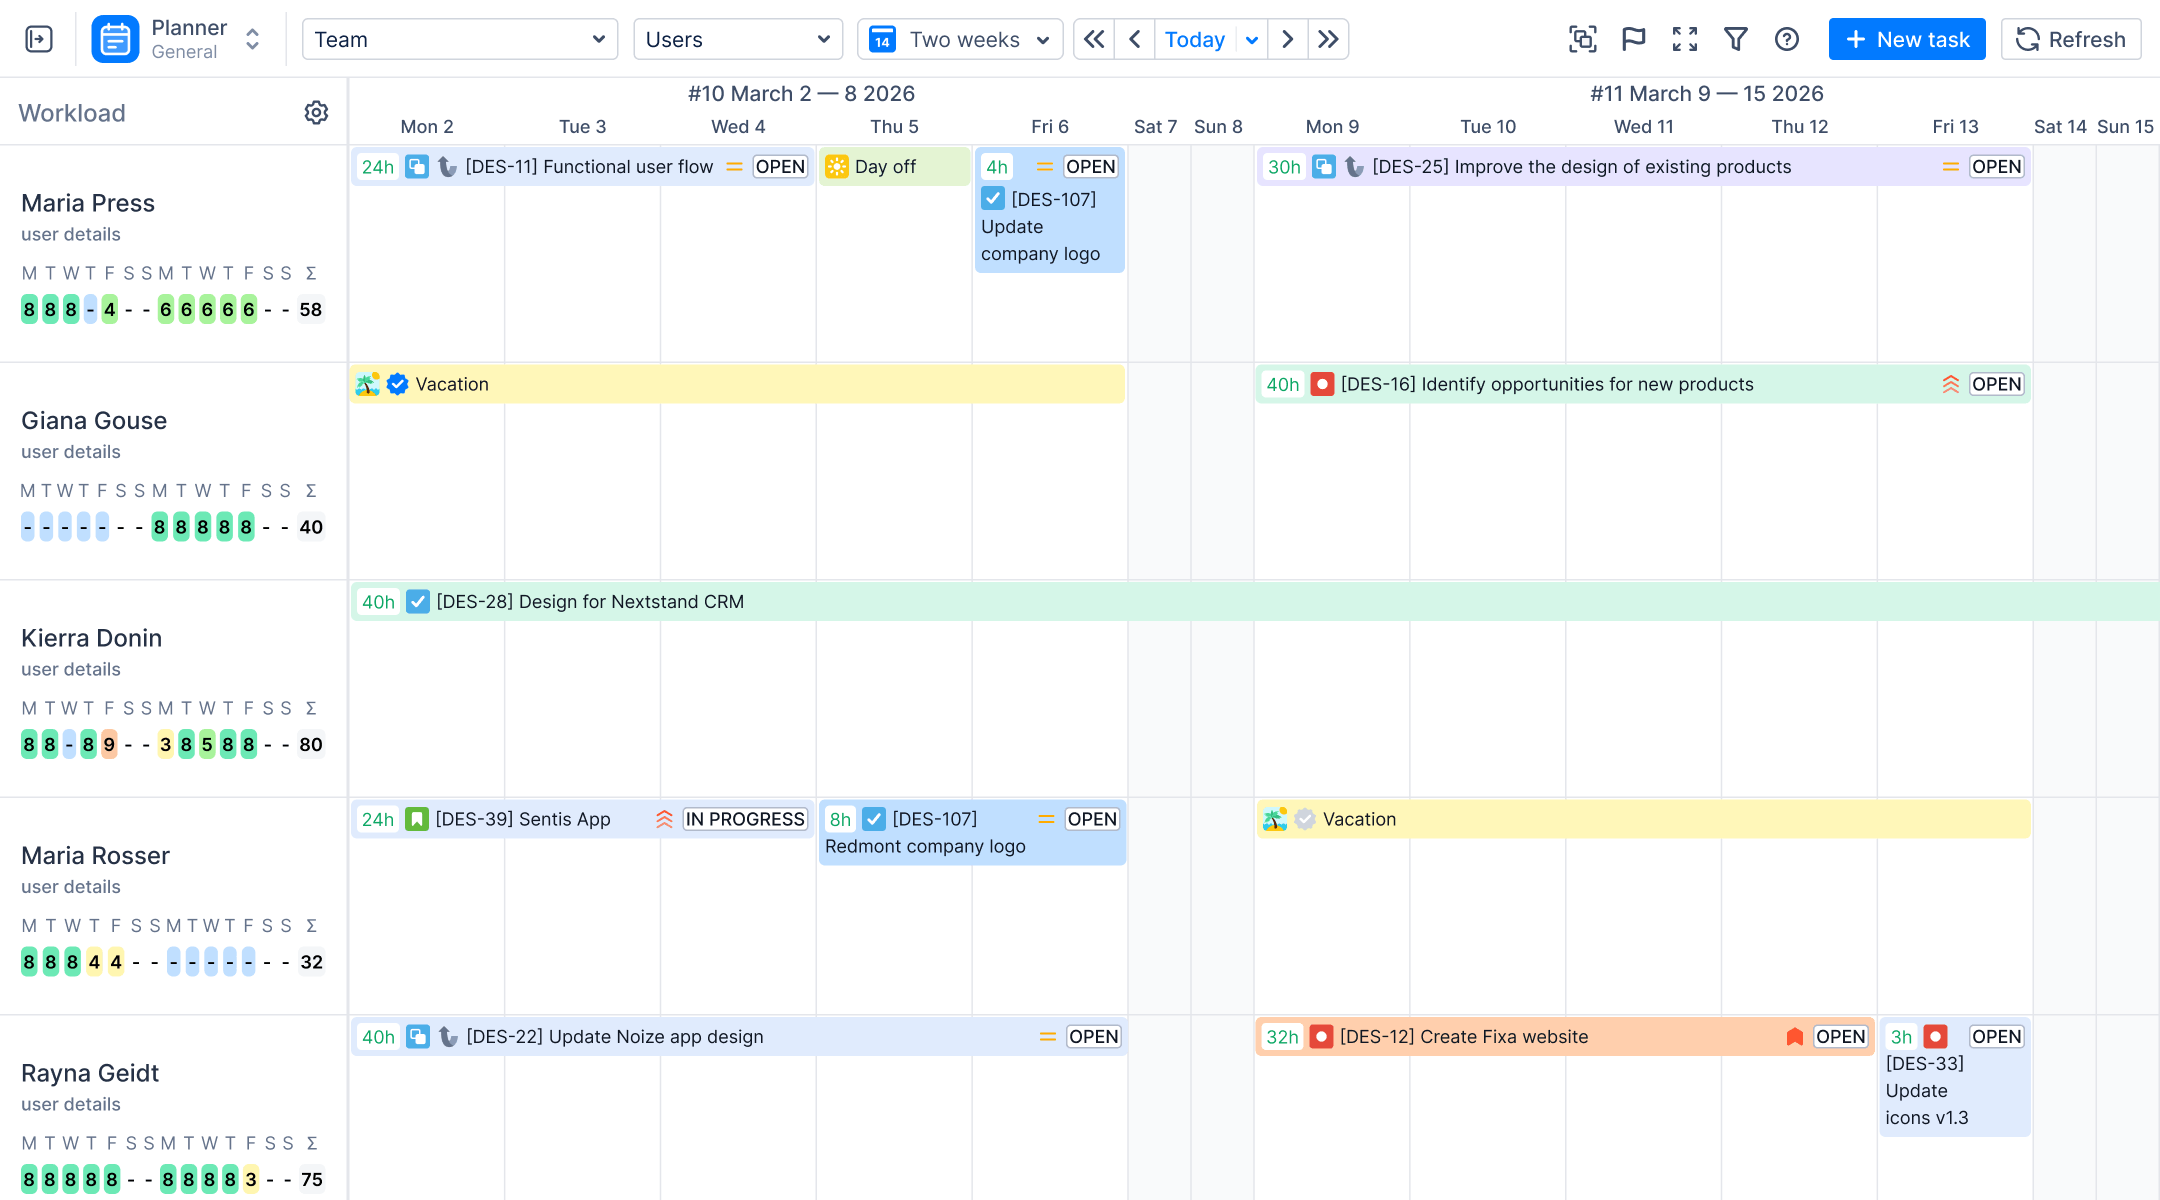
Jira has no built-in milestone feature. There is no milestone issue type, field, or timeline marker out of the box. Teams simulate milestones with due dates, releases (fix versions), or epics — or add a true milestone layer with an app. This guide compares all six approaches and shows how to create and track milestones on a visual timeline in Jira with ActivityTimeline.
What is a milestone in Jira?
A milestone in Jira is a fixed point on a project timeline — a release date, delivery, demo, or deadline — used to mark when a defined chunk of work must be complete. Unlike tasks, milestones have no duration: they are checkpoints against which progress is measured. They can be used to track progress, measure success, and provide deadlines to keep your team on critical tasks. Jira milestones can be used to measure the success of any project, big or small.
By using Jira project milestones, project managers can get a better understanding of their project progress and make sure they’re on track to meet their deadlines. They can also use the timeline view to visually track progress and manage tasks.
Finally, they can generate reports to identify areas for improvement and make adjustments as needed. This makes it easier to ensure that projects stay on track and are completed on time.
How do you create milestones in Jira without an app?
Currently, Jira doesn't offer milestone feature out-of-the-box. But still, you can add milestones with different workarounds. Here are some of them:
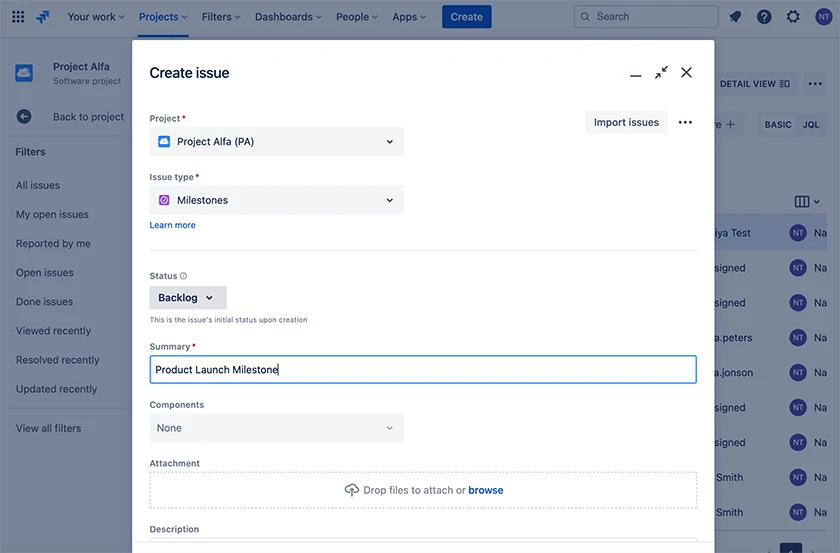
Create a custom issue type in Jira for tracking
You can create a custom issue type specifically for milestones and then use it to track progress. To use an issue type for milestone tracking, you need to create a custom field in Jira to track the milestone, and then create an issue type to add milestones.
You can then link issues to the milestone, track progress, and generate reports to measure the progress of the Jira milestone. This is a great way to track progress and ensure that milestones are completed on time.
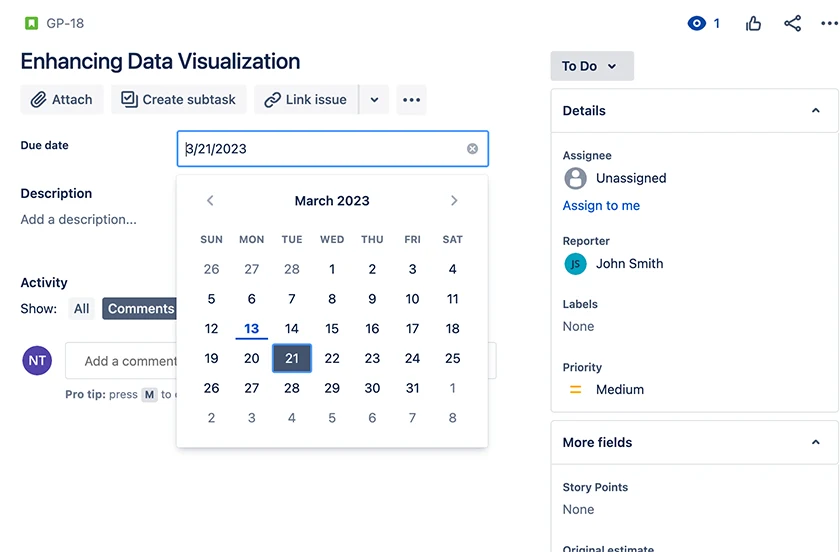
Create a Due Date to track Milestones:
Due date is a great way to track Jira milestones. Create a new Custom field Due Date, and link in Field Configuration Schemes. You can use it to set deadlines for tasks and project milestones and track progress. Additionally, the due date can be used to generate reports to measure progress and identify areas for improvement.
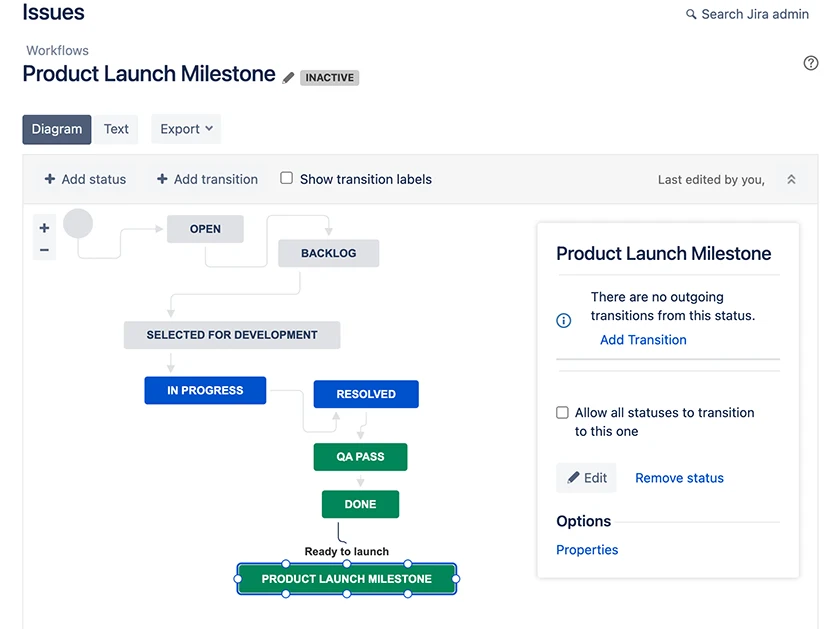
Create a custom Jira workflow status for Milestones and use it for the Status field:
You can create a custom workflow for milestones and use it in the Status field in Jira. It is better to create milestones as the last step in the workflow. But this method will show progress and finished project milestone, but will not track your milestone in time.
Create a Release version in Jira to track Milestones
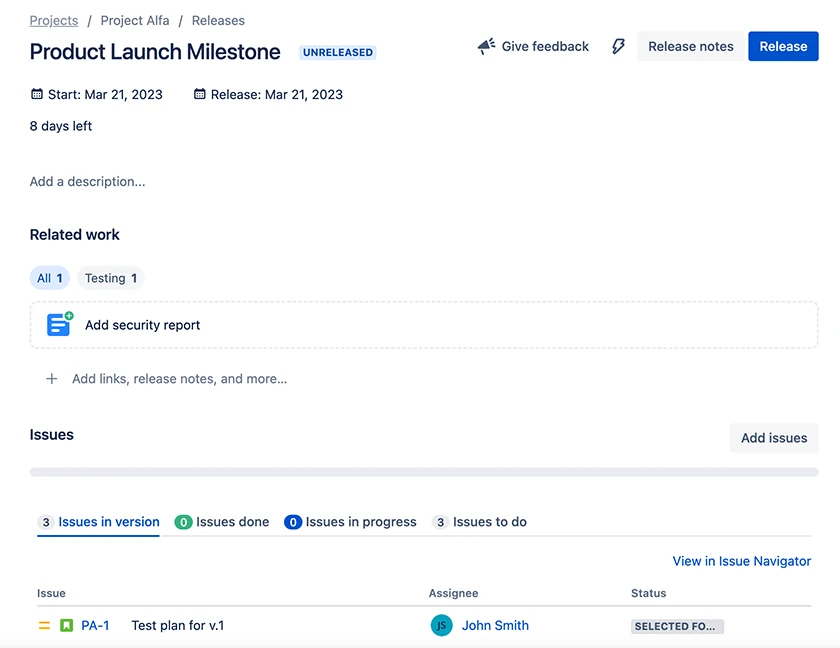
Release versions can be used to track Jira milestones as well by creating a separate release version for each milestone. This will allow you to track progress and set deadlines.
You can also add issues to the milestone, and set up notifications to keep your team on track and ensure the milestone is completed on time. In every issue related to a milestone, you will see a Release linked with the name of your milestone.
Create an Epic with a deadline to track Milestones
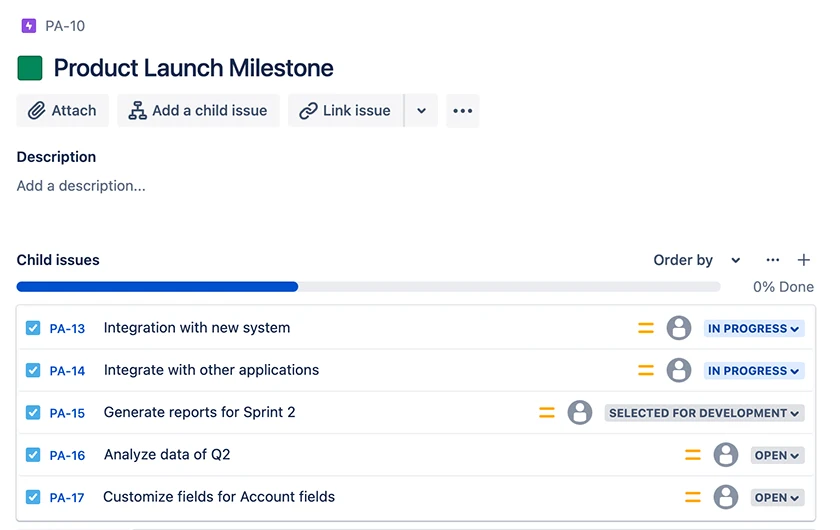
You can create an Epic with a deadline to track your milestones. You can also create sub-tasks for each milestone and assign them to the Epic. Or you can link the issues to Epic. This will provide a clear view of how each milestone is progressing.
Use a third-party app such as Activity Timeline to track Milestones:
It is possible to add milestones in Jira using ActivityTimeline. ActivityTimeline makes it easy to create and track them with its intuitive interface and powerful reporting capabilities.
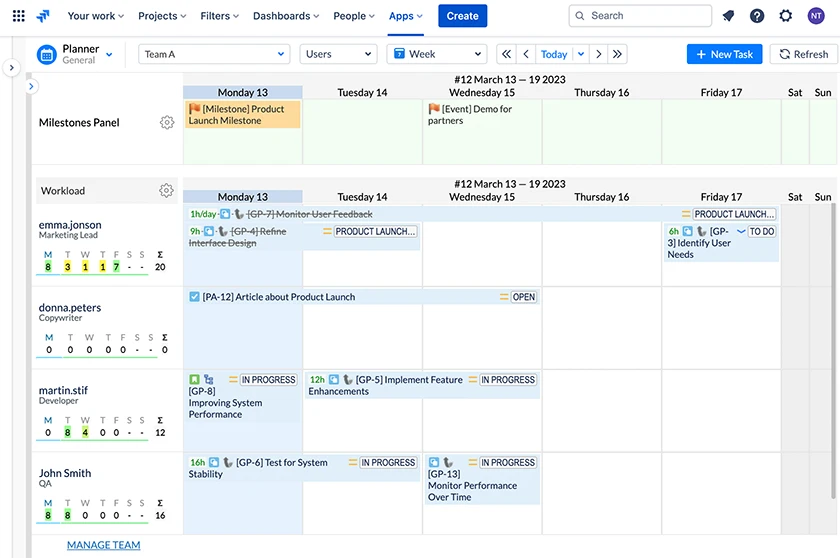
You can create milestones by clicking the “Milestones” icon in the top navigation bar, a board with a milestone panel will show up, enter the details such as for your milestone, and then use the timeline view to visually track progress and manage tasks.
Finally, you can generate reports to identify areas for improvement and make adjustments as needed.

How do you create and track milestones with ActivityTimeline?
ActivityTimeline makes it easy to create and track Jira milestones. With its intuitive interface, you can quickly set up your milestones and start tracking progress.
Here’s how to get started:
1. On the Planner dashboard, open the Milestones Panel — click the flag icon on the right panel toolbar (the panel is hidden by default).
2. Click the ⚙️ icon to choose which projects and boards the panel displays.
3. Click a date on the milestone row to create a milestone; give it a name and type (general milestone task, event, release, delivery, and deadline.) Or you can create your own Milestone type in Administration.
4. Drag a milestone to move its date; click it to edit or delete.
The panel also visualizes sprints for their full duration, and dragging a task onto a sprint line updates the sprint value in Jira itself.
Milestone Filters
By default, the Milestones Panel respects the currently selected team.
When the filter is On, only milestones and Jira issues relevant to the selected team are displayed.
When the filter is Off, milestones and issues assigned to users across all teams become visible.

Start Tracking Milestones
Once you’ve created a milestone, you can start tracking progress. To do this, you can use ActivityTimeline’s timeline view, which provides an easy-to-understand visual representation of progress.
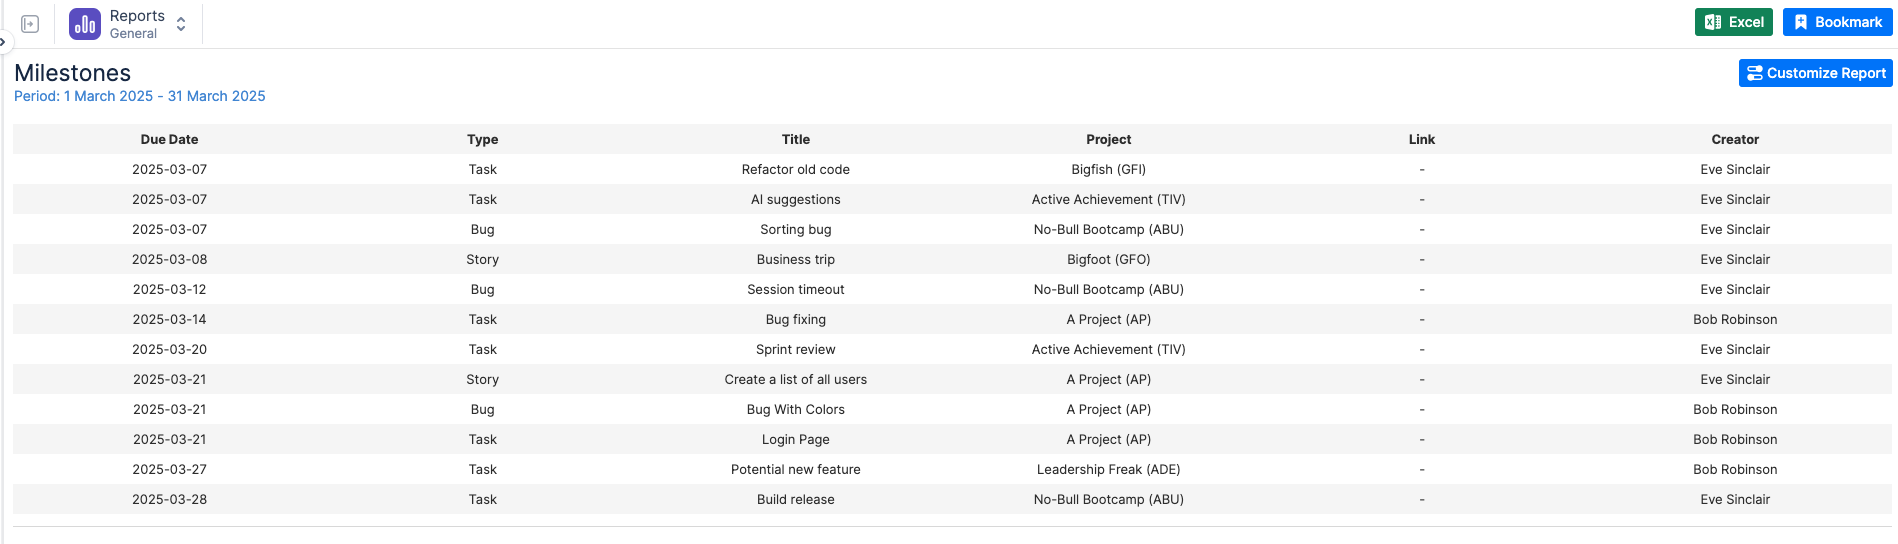
You can use ActivityTimeline’s Reports view to generate reports on the progress of your project. This is a great way to visualize your project’s progress, see the critical path in your milestone achievements and identify areas for improvement.
Jira milestone examples
Here are two cases of Jira Milestones examples:
Example 1: Setting Milestones for a Software Development Project For a software development project, a project manager may want to set milestones for key deliverables, such as:
- Prototyping (estimated completion date: 1 week)
- Beta version (estimated completion date: 2 weeks)
- The final version (estimated completion date: 6 weeks)
Using ActivityTimeline, the project manager can easily create and track these milestones. They can also use the timeline view to track progress and the Kanban view to manage tasks. Finally, they can generate reports to visualize progress and identify areas for improvement.
Example 2: Setting Milestones for a Website Development Project For a website development project, a project manager may want to set milestones for key deliverables, such as:
- Design (estimated completion date: 2 weeks)
- Development (estimated completion date: 4 weeks)
- Testing and QA (estimated completion date: 1 week)
- Launch (estimated completion date: 2 weeks)
Each phase gets a milestone flag on the timeline; the Reports view then shows whether work scheduled against each milestone is on track.
Final thoughts
ActivityTimeline makes it easy to create and track Jira milestones. With its intuitive interface and powerful reporting capabilities, it’s an essential tool for any project manager. So if you’re looking for a more efficient way to manage milestones, give ActivityTimeline a try.
See every milestone on one timeline. Create milestone flags for releases, deadlines, and demos across all your Jira projects — and track the work scheduled against them. Start a free 30-day trial.



![Top 11 Time Tracking Software for Consultants [2026]](https://cdn.prod.website-files.com/60c76f07dc83db305171350c/69679a38bef00e707d73bb86_thumbnail_10%20Best%20Time%20Tracking%20Software%20for%20Consultants.png)