

Setup Classic ActivityTimeline Team for Jira
Once you add ActivityTimeline to your Jira instance and go through Setup Wizard, you will be presented with a dashboard of users, a list of the tasks, and an open question: ‘Where do I start?’

So at this point, we suggest you start with going to configuration and setting up your first team:

Once you click on ‘Create New Team’ you will be presented with a dialogue where all you need to do is simply indicate the name of the team and add people into a team either via drag’n’drop or by clicking on the ‘+' icon. After all needed people were added, just hit the ‘Create’ button and you’ll be all set:

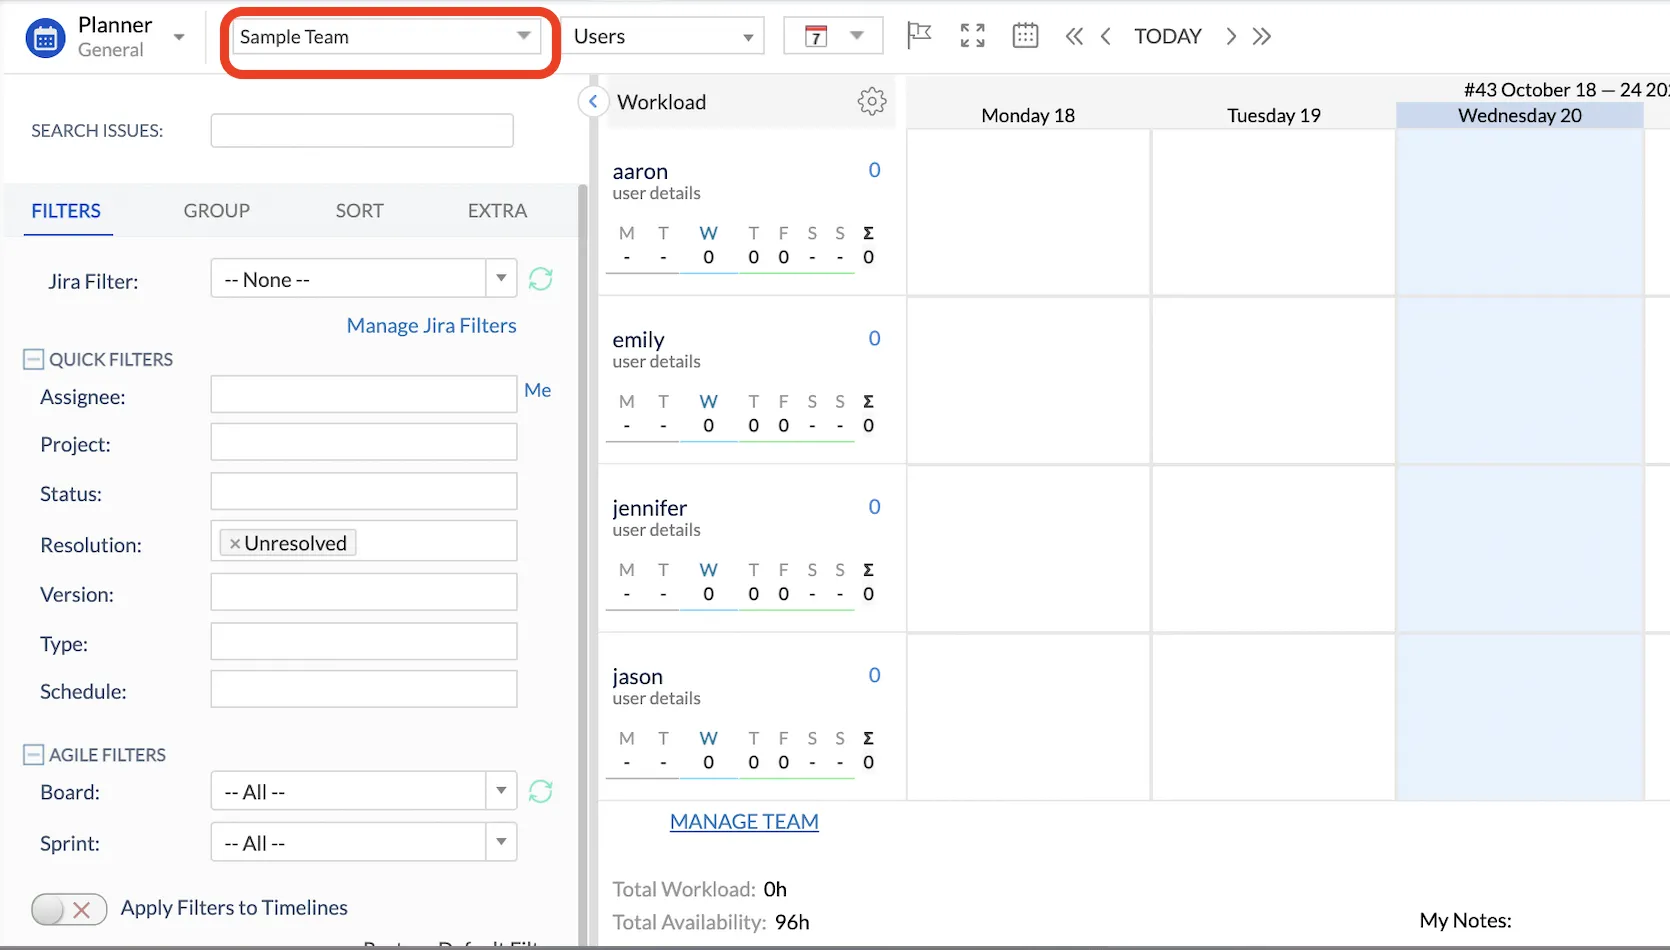
That’s it, your first team is created and you can start your planning, this team will be available in every module of ActivityTimeline:

In addition to the Classic teams, we also have skill-based Functional teams, that allow you to forecast the capacity of your resources based on their areas of expertise.
Assign Jira Users to Roles, Positions, and Skills
Resources are an integral part of ActivityTimeline and to be able to properly manage them in the application, we recommend you to assign a set of meta-data to them that will enable better resource planning.
Roles
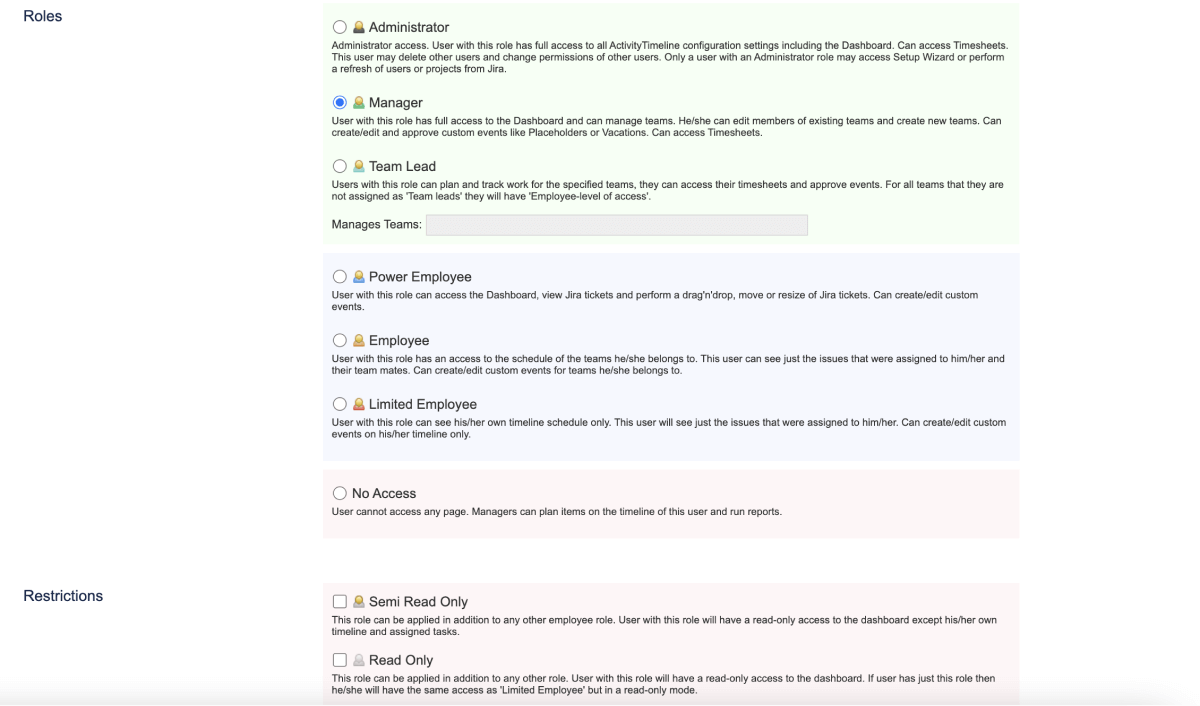
Roles are essential for permissions in ActivityTimeline, as they define what people can see and do in the application. Below you can see our recommendation for each of the roles:
Admin Role - for Jira admins, also can be assigned for non-admin Jira users.
Managers - it’s a general manager position, fits well for C-level Executives, Department Leaders, Program, Delivery & Senior Project Manager, and other people that have access to all teams in the organization.
Team Leads - this is a perfect role for Project Managers, Business Analysts, Team Leads that only manage certain teams without access to all the teams within the organization.
Employee - individuals that are only responsible for themselves and are doing their tasks.
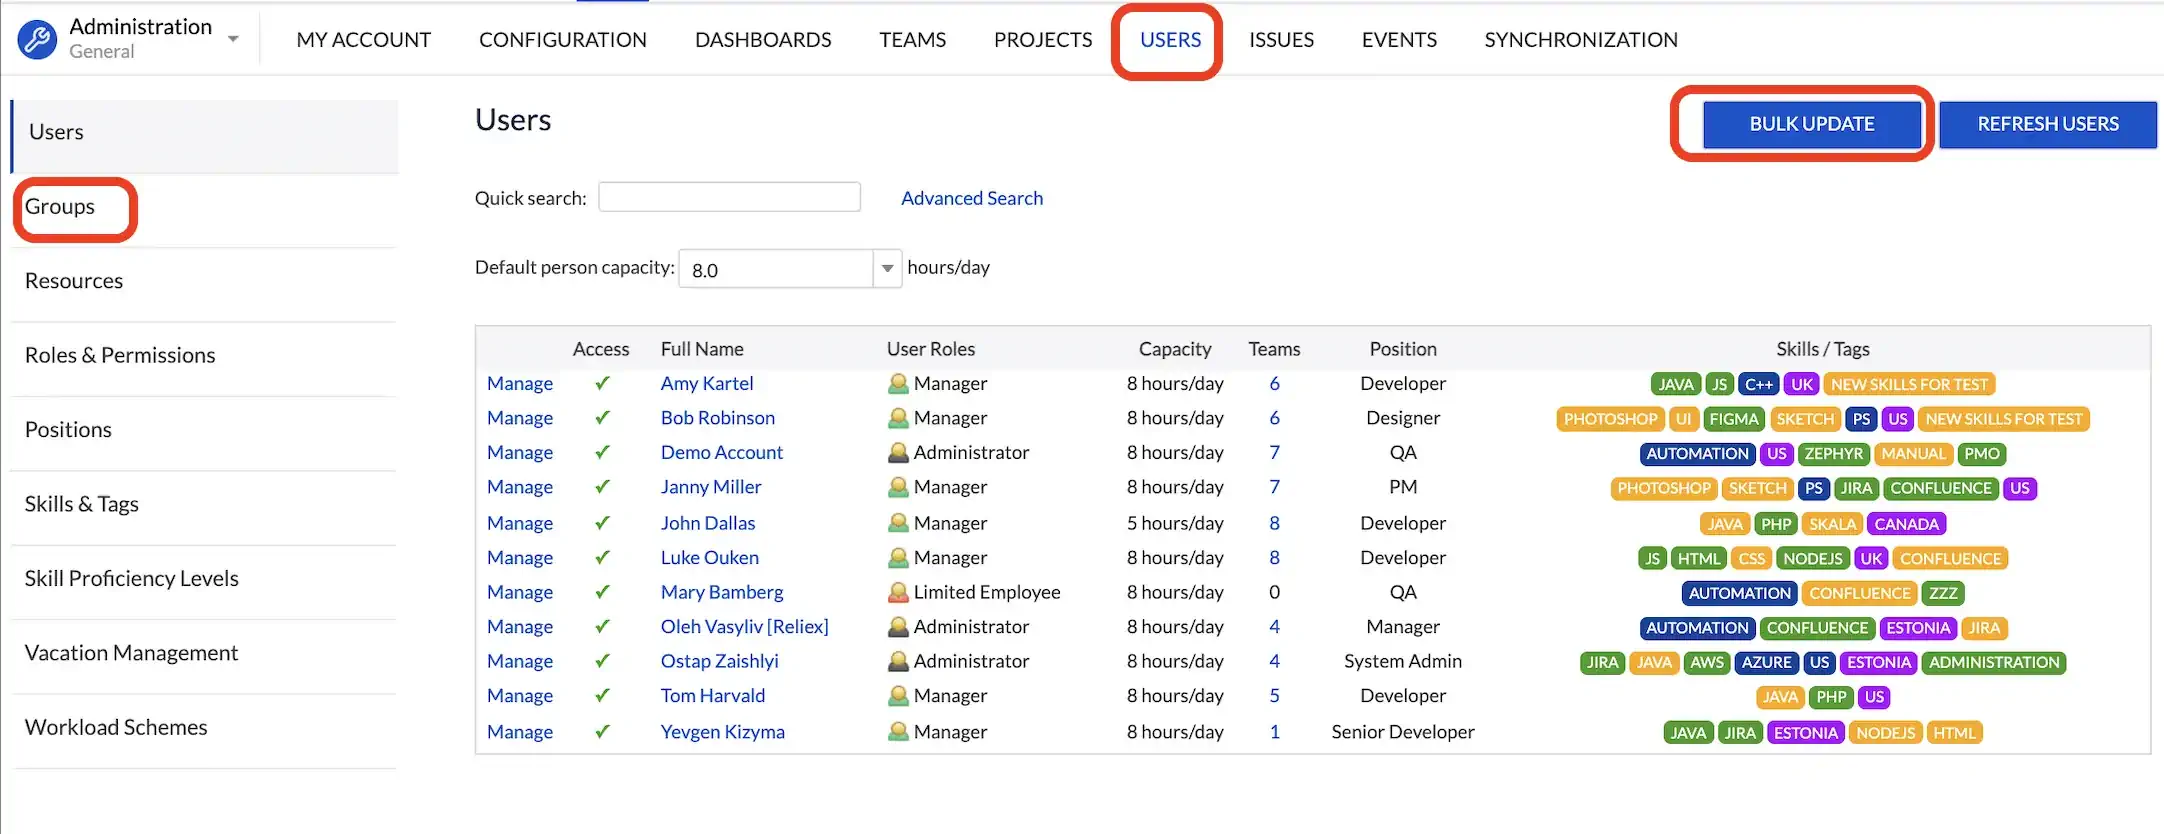
We recommend opening Configuration->Users->Bulk mode to assign users to roles in bulk and avoid manual work (can also be used for positions and skills).
For instance, with over a hundred users, we recommend using our Group Management feature to configure permissions as well as other settings on the instance in bulk mode.
Positions & Skills
Additional information about the user that can be used for searching of users with specific skills/position, reporting, or Functional (Dynamic) teams.
Once you have your teams created and users assigned, we recommend filling in positions and skills. You can create skills and positions simply by typing in the appropriate field:
Once you have your teams created and users assigned, we recommend filling in positions and skills. You can create skills and positions simply by typing in the appropriate field:
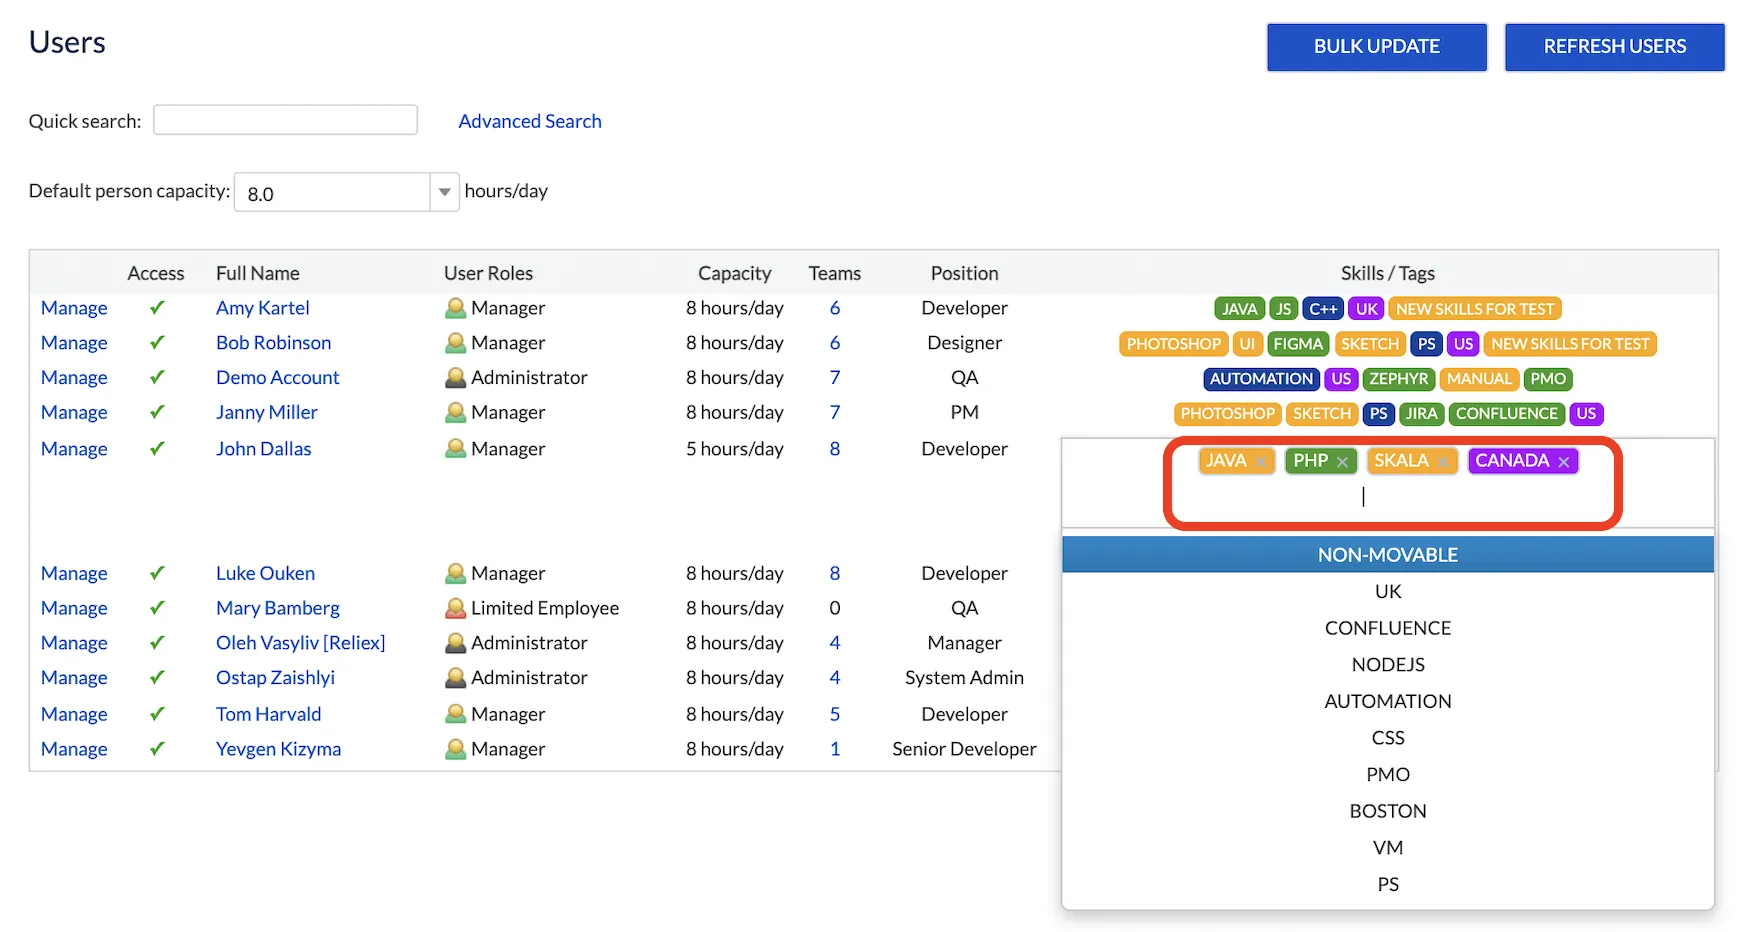
What you can do with Positions & Skills?
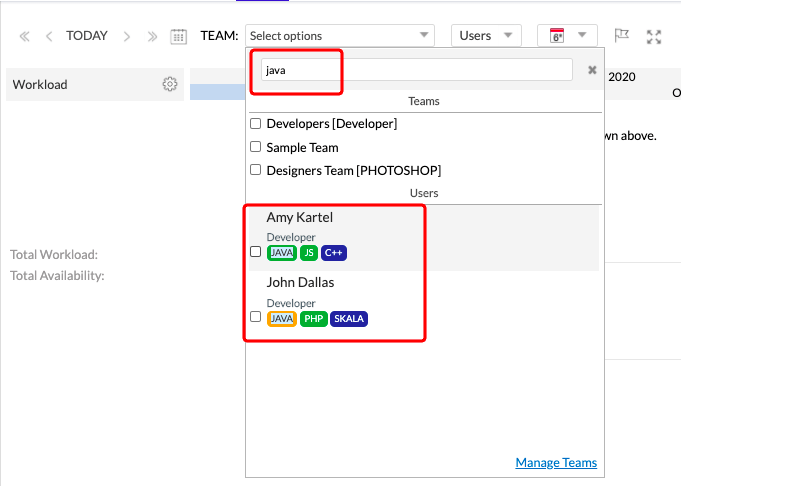
You can specify them in the search to find resources with a specific skill set:
You can specify them in the search to find resources with a specific skill set:
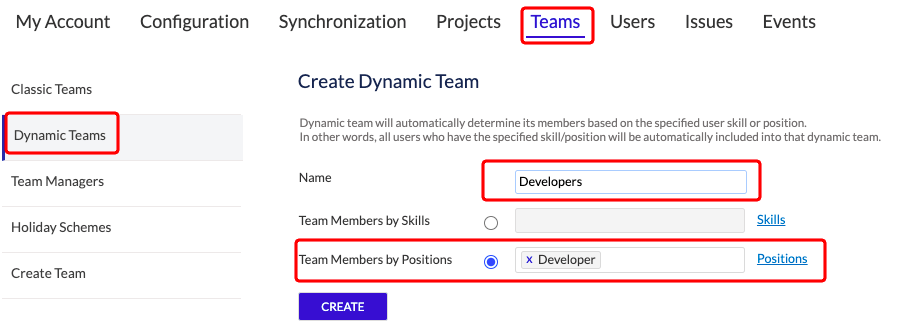
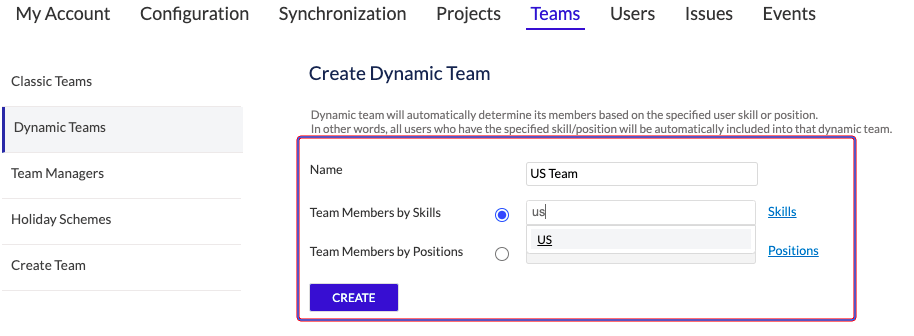
Dynamic Teams can be generated based on skills or position. This means that the system will automatically add people with a specific skill into a team, you can learn more about this in our documentation portal.
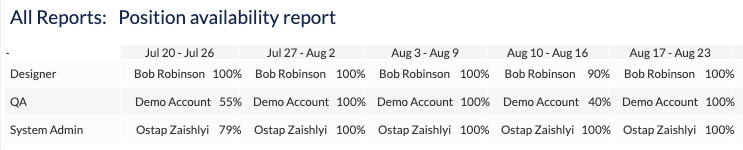
Reports can be generated based to see when people from specific positions or skills set are available:
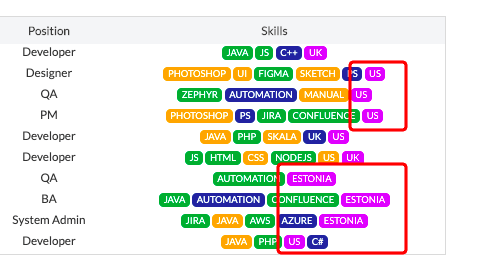
Use Skills as ‘location tag’, meaning you can use the ‘Skills’ section to display a person’s location, which is useful when you work in a geographically dispersed team.
You can then create “location-based” teams by using the ‘Dynamic Team’ feature:
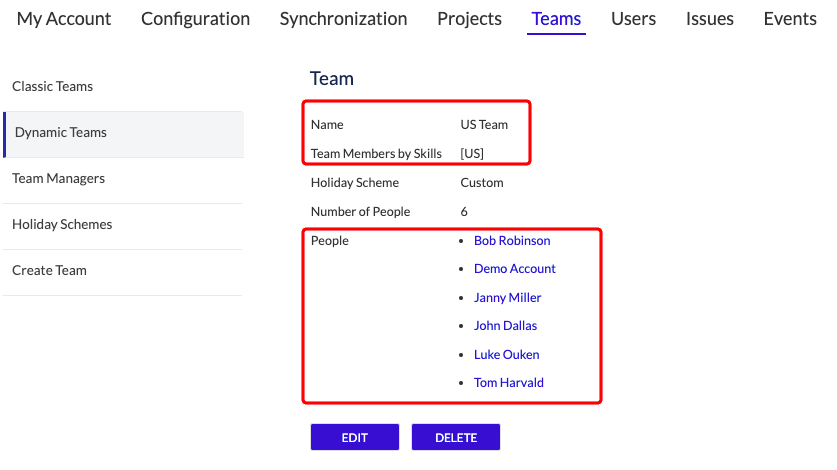
The system added everyone with a ‘US’ location tag to the US team:
Map Jira Custom Fields
This step is optional, yet we recommend doing it as it will allow using the full capability of ActivityTimeline.
By default, ActivityTimeline connects to Jira only through the ‘Assignee’ field, meaning it knows whom the task is assigned to, but does not know where to allocate it on the person’s timeline, hence it should all be done manually.
There is nothing wrong with manual planning via drag’n’drop, however, if you want the dates of the task to be displayed in Jira as well as be able to schedule tasks right from your issue, we recommend mapping your Start/End dates to ActivityTimeline.
To connect your Jira Start/End date fields to ActivityTimeline follow this simple guide:
If you already have Start/End Dates custom fields in your Jira (any Date Picker or Date/Time picker format will work), you can map them to ActivityTimeline, so that it could read this data from Jira and display your Tickets automatically.
You can do this by doing the following:
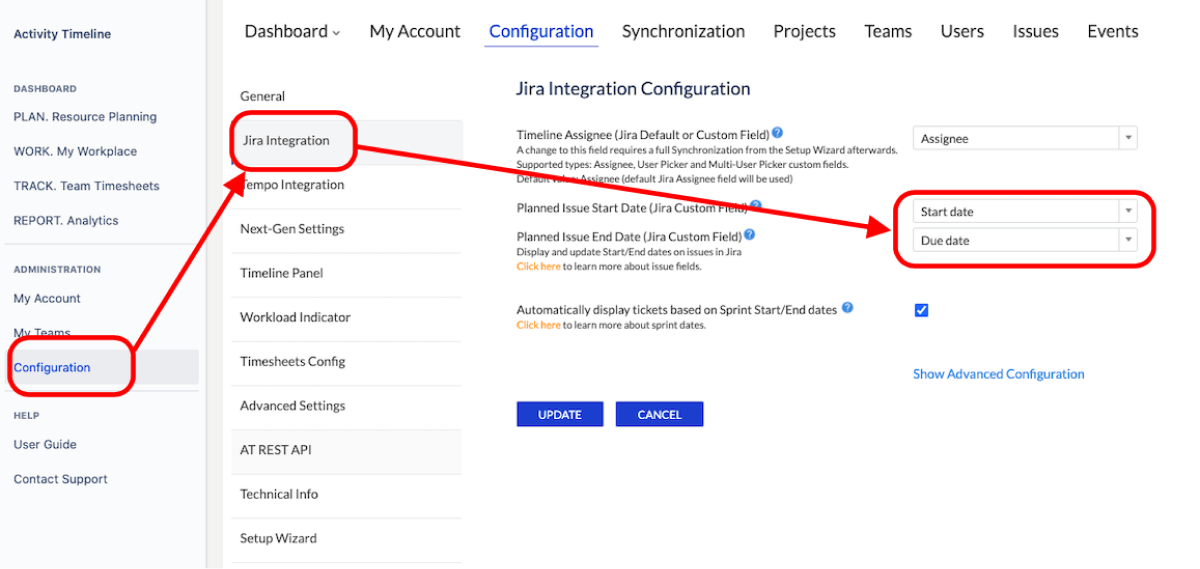
Go to ActivityTimeline Configuration-> Jira Integration-> From the dropdown choose your Start/End date fields->Click on ‘Update’ button:
By default, ActivityTimeline connects to Jira only through the ‘Assignee’ field, meaning it knows whom the task is assigned to, but does not know where to allocate it on the person’s timeline, hence it should all be done manually.
There is nothing wrong with manual planning via drag’n’drop, however, if you want the dates of the task to be displayed in Jira as well as be able to schedule tasks right from your issue, we recommend mapping your Start/End dates to ActivityTimeline.
To connect your Jira Start/End date fields to ActivityTimeline follow this simple guide:
If you already have Start/End Dates custom fields in your Jira (any Date Picker or Date/Time picker format will work), you can map them to ActivityTimeline, so that it could read this data from Jira and display your Tickets automatically.
You can do this by doing the following:
Go to ActivityTimeline Configuration-> Jira Integration-> From the dropdown choose your Start/End date fields->Click on ‘Update’ button:
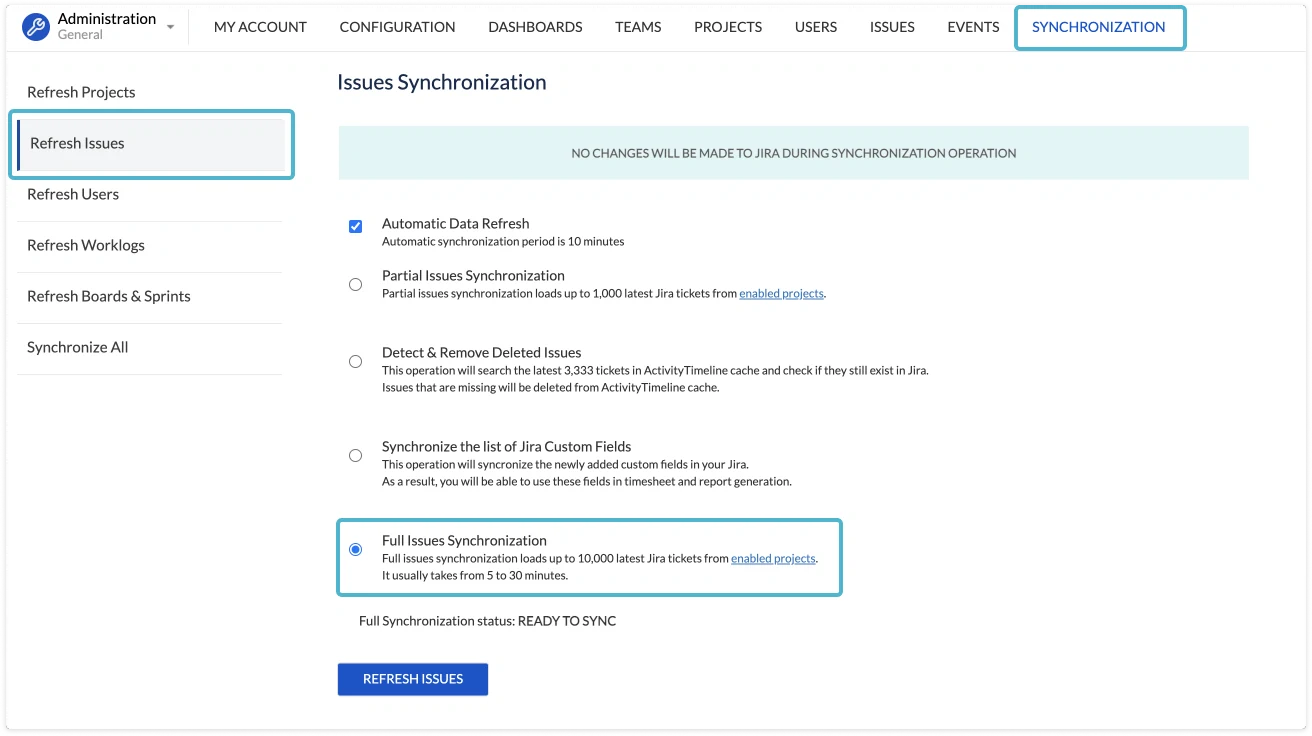
Then go to Synchronization->Refresh issues->Perform full synchronization, so that system could re-cache all the issues.
If you already have some issues scheduled on your dashboard, changing the configuration of your Start/End Dates field will remove them from the schedule, so we recommend first making sure that all those tickets also have Start/End dates set in Jira.
In case you do not have any custom fields in your Jira that could work as Start/End for ActivityTimeline, you can create new fields simply by following the guide that we have here:
How to setup Start / End Date custom fields for Jira issues
After you have these fields created, follow the same procedure as mentioned above.
You can use the following fields to integrate ActivityTimeline with other applications that use date picker fields, like BigGantt or BigPicture by Softwareplant. You can check our guide on how to perform this integration here.
Assign Jira Tasks & Custom Events
When you have your teams created, users assigned to the required roles and positions, you are ready to start planning actual Jira tasks.
The whole concept behind scheduling tasks in ActivityTimeline is fairly straightforward, you just take the task on the left and drag’n’drop it to the user’s timeline, where you can re-size it or even split it between users or dates.
The whole concept behind scheduling tasks in ActivityTimeline is fairly straightforward, you just take the task on the left and drag’n’drop it to the user’s timeline, where you can re-size it or even split it between users or dates.
If you followed our advice in the “Map Custom Fields” section of this guide, you also have an option to assign tasks not only via drag’n’drop but by going to your Jira and specifying Start/End dates there:
For people that use Scrum a lot and are not interested in scheduling individual tasks, we have good news as well: you can select an option in the configuration, that would allow the system to read Start/End dates of the sprint and would schedule tasks assigned to a user based on these days.
For this, you don’t even need to map your custom fields between Jira and ActivityTimeline, as the system will read Start/End dates from Jira Sprints. To enable this feature, go to Configuration->Timeline Panel-> Check the box ‘Reuse Agile Sprint period’->Go to Synchronization and perform a Partial Synchronization:
For this, you don’t even need to map your custom fields between Jira and ActivityTimeline, as the system will read Start/End dates from Jira Sprints. To enable this feature, go to Configuration->Timeline Panel-> Check the box ‘Reuse Agile Sprint period’->Go to Synchronization and perform a Partial Synchronization:
As for local events, you can create them simply by selecting a specific period on the calendar and choosing which event to create. You can check the details about our “Local events” here.
When you unschedule a local event from the user, it disappears, as there is no backlog for events at the moment.
If you have any remaining questions on how to set up your instance or anything else regarding ActivityTimeline, please don’t hesitate to contact our team at: support@reliex.com or schedule a free 30-minutes call with our experts.
If you have any remaining questions on how to set up your instance or anything else regarding ActivityTimeline, please don’t hesitate to contact our team at: support@reliex.com or schedule a free 30-minutes call with our experts.


