


Effective project management is crucial for businesses to stay competitive and deliver successful outcomes. Jira is an industry-leading project management solution that helps organizations plan, track, and roll out projects effectively. Team capacity management is critical for any project, and it provides powerful features to make it seamless.
The following information aims to provide you detailed information and insights about Jira teams, how to add teams in Jira, and highlighting best practices to optimize your team's productivity in 2024.
Overview of Jira Teams
From small startups to large multi-national companies, everyone is using this versatile tool to ensure that teams are productive and strategies are implemented with efficiency. Whether you're working on software development, marketing campaigns, or any other project, Jira can streamline your processes and help you achieve your goals.
With it, teams can easily assign tasks to team members, communicate progress on tasks and projects, and track and prioritize work. Jira empowers teams to collaborate closely, work more efficiently, and develop a better understanding of their projects and their needs.
At the start of any Jira project, teams can create a backlog which allows them to record all the work that needs to be done and ensure each task is properly tracked. To ensure team collaboration is seamless, Jira also allows teams to get an overview of each member’s work, assign tasks to different members, track status updates, and manage dependencies.
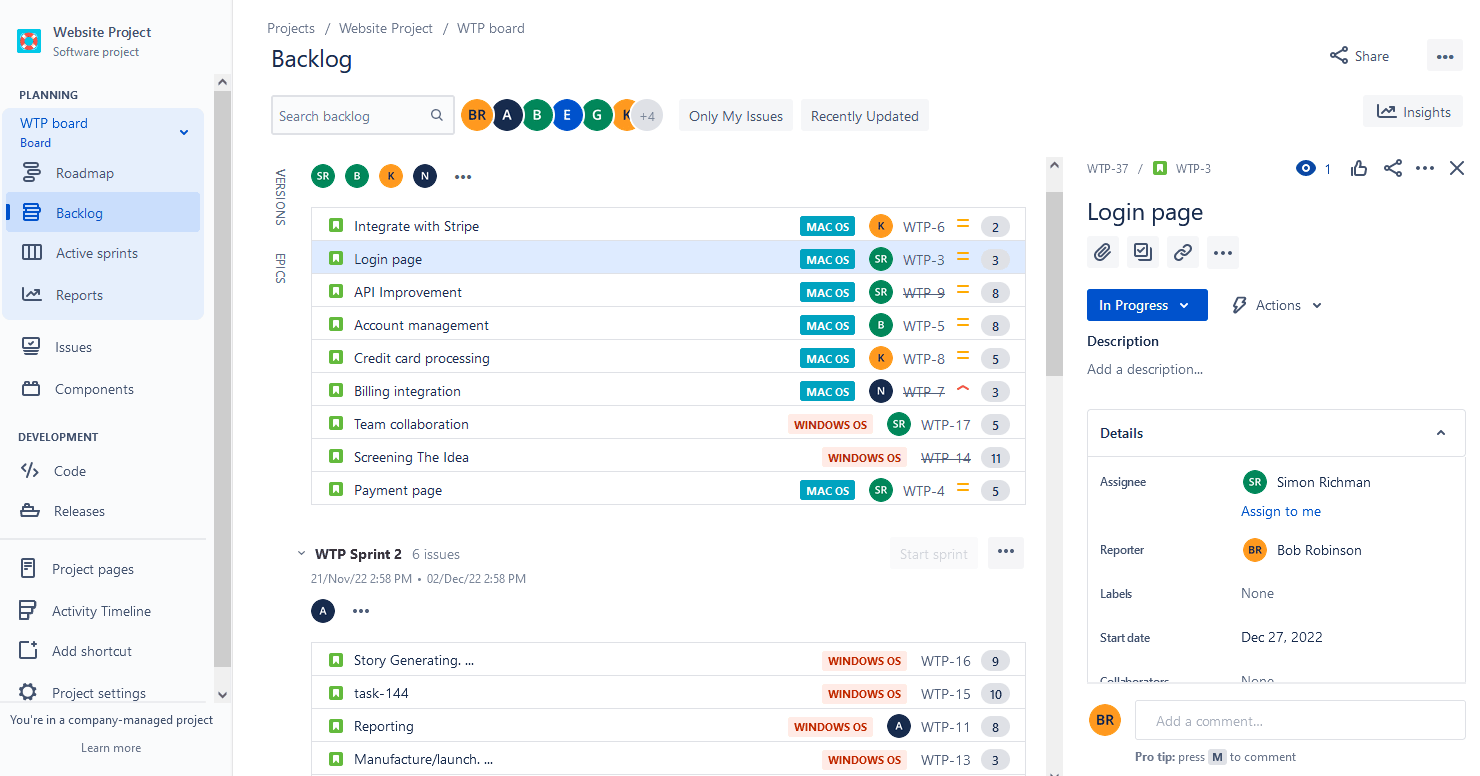
Teams have the power to see what is being worked on, who is currently working on it, and which tasks have been completed. Its project and issue tracking system allows team members to quickly plan out complex projects, assign tasks to the right people, view project progress in real time, and recognize the progress of others.
Setting Up Your Team in Jira
Setting up a real world team can be a simple and effective way to keep everyone organized and on the same page in regard to project plans, deadlines, and deliverables. As a project manager, you can use Jira to plan, track progress, and report on all aspects of the project.
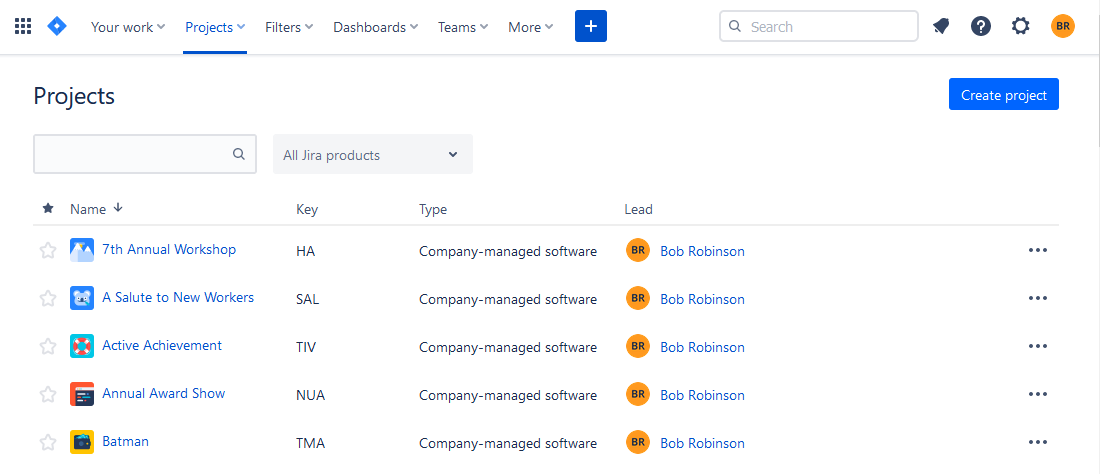
First, you'll need to decide on the type of project you're working on and create an appropriate project plan. Start by creating a new project.
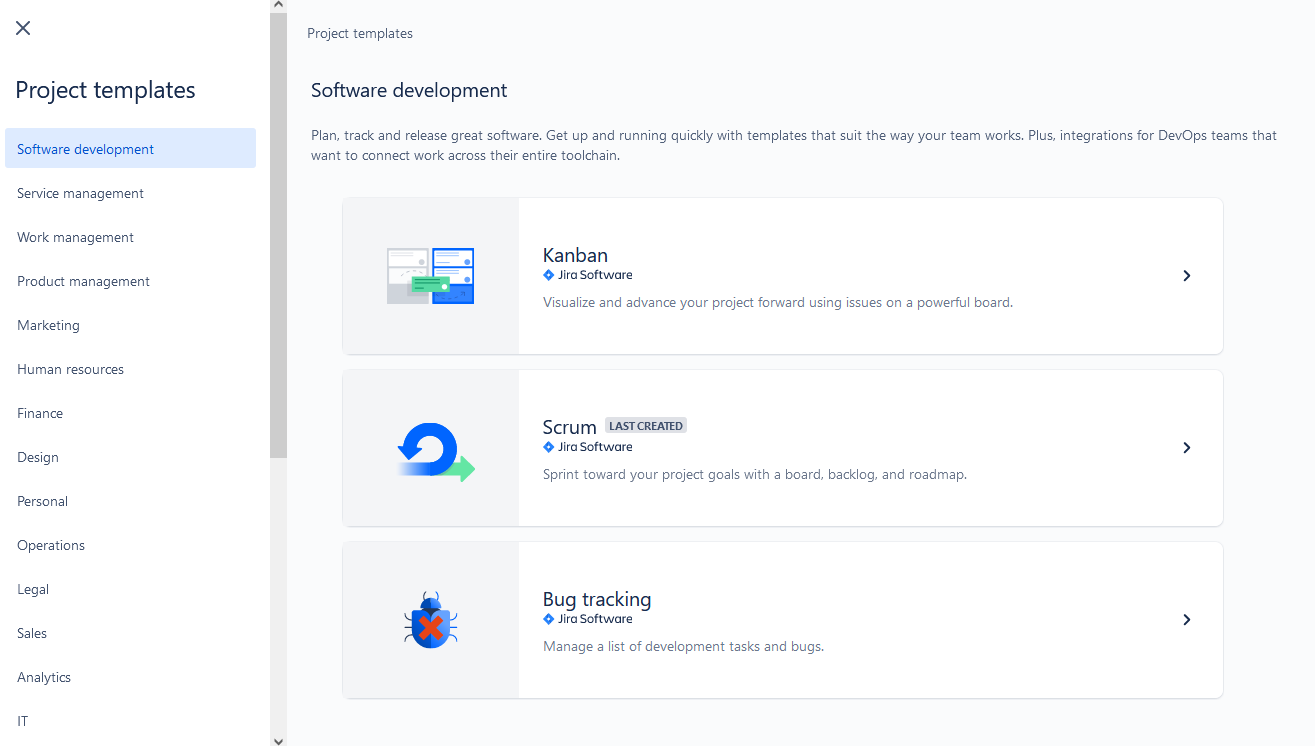
Choose the appropriate project template based on your team's needs. There are templates for software development, project management, content creation, and more. Selecting the right template provides a foundation with preconfigured workflows and Jira issue types that align with your team's objectives.
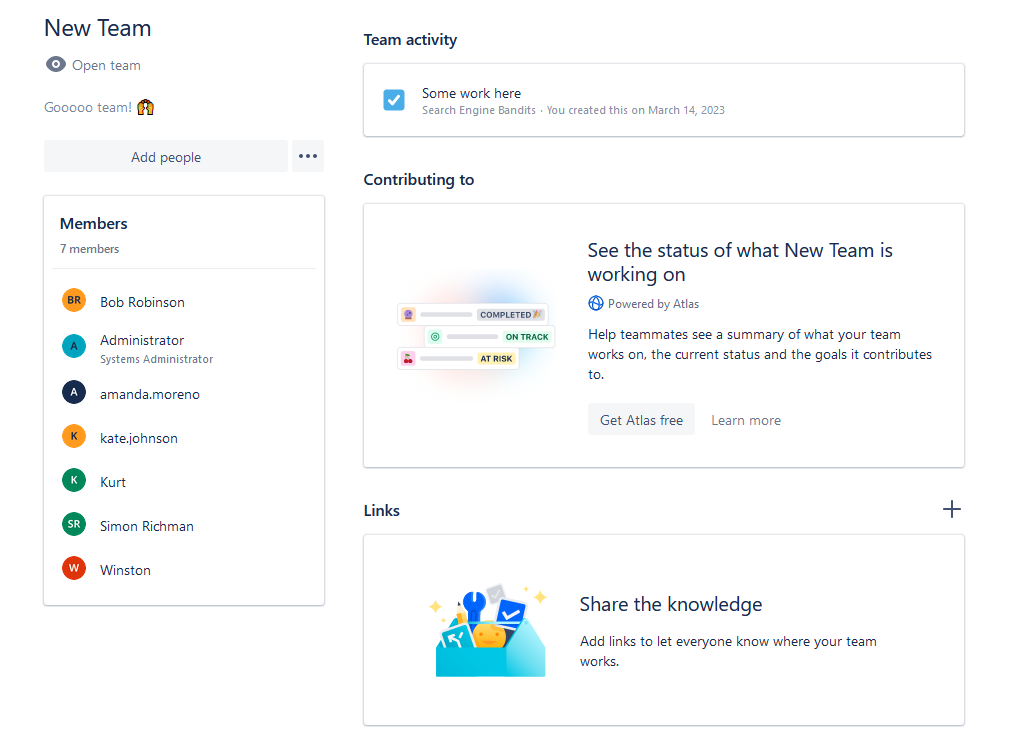
Next, you'll need to set up your team. You can use the Jira team management feature to create roles and assign people to each role. You may also designate a team lead for your newly created team who is responsible for monitoring the project's progress and making sure that everything is running smoothly.
Then, you'll be able to assign tasks within each role and assign users to each task. Monitor the progress of each task and assign users specific deadlines. This is useful for ensuring that everyone is on the same page with regard to project progress and completion.
How to Create New Jira Teams
Creating a team is fairly straightforward:
- Access Jira: Log in to your Jira account and navigate to the Jira dashboard. Ensure that you have the necessary permissions to create a new team.
- Go to the "Teams" Section: It is usually represented in the top menu.
- Click on "Create Team": Look for the "Create Team" button and click on it. This will initiate the team creation process.

4. Provide Team Details: In the team creation form, enter the necessary details for your new team. You can add members by typing in their email addresses or selecting them from the list of users.
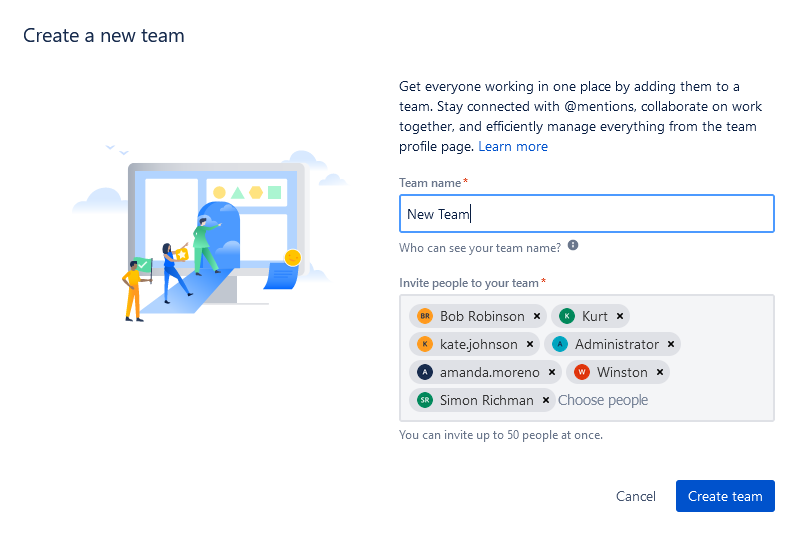
Once you have created a team, you can start creating projects and assigning issues. When you create a new team, you can also choose its visibility settings. You can set a team to be visible to select people, visible to all users, or hidden.
Easy Steps to Effectively Manage Your Jira Teams
This software from Atlassian not only has the tools to help teams collaborate but also provides the needed structure and insight to effectively manage them. The following are some of the easy steps that can help you manage your teams better.
- Set clear expectations. Outline your desired goals and objectives to help define and focus activities for your team. This will provide clarity and focus on what is expected from each team member. It is also best to track the progress and deliverables on a regular basis to ensure teams are meeting their deadlines.
- Use Jira’s project and workflow management features. There are great project and workflow management options, such as boards, sprint management, and custom workflows. This ensures tasks and projects are assigned and tracked accordingly. With Jira’s reports and insights feature, you can easily monitor team in Jira and project performance.
- Assign teams the right tools for collaboration. With so many options available, you need to find the right tool for your specific collaboration needs. Having the right tools at the right time can make collaboration and productivity a breeze. There are 3rd-party Jira teams integration capabilities to ensure users can access data and tools from multiple sources. It seamlessly integrates and consolidates multiple tools and solutions for maximum efficiency and productivity. For instance, it brings together Jira Software, Confluence, Bitbucket, and Trello, providing teams with access to a single workflow solution. In addition, teams can stay on top of progress with Jira's email notifications and Slack integration.
- Nurture team culture. One of the key elements of managing teams effectively is to ensure team members are comfortable and open to expressing their thoughts. Good team morale will ensure that team members are engaged and motivated. Building a good team culture can also help to improve productivity and creativity.
- Ensure consistent feedback. Consistent feedback is essential to foster effective communication between team members. This can be done by commenting on task progress in Jira or sharing additional information in Confluence or Slack. By regularly providing feedback on progress, performance, and suggestions for improvement, teams can better collaborate and make better decisions.
Best Practices for Using Jira Teams
To make the most of Jira Teams and ensure optimal productivity and efficiency, it's essential to follow these best practices:
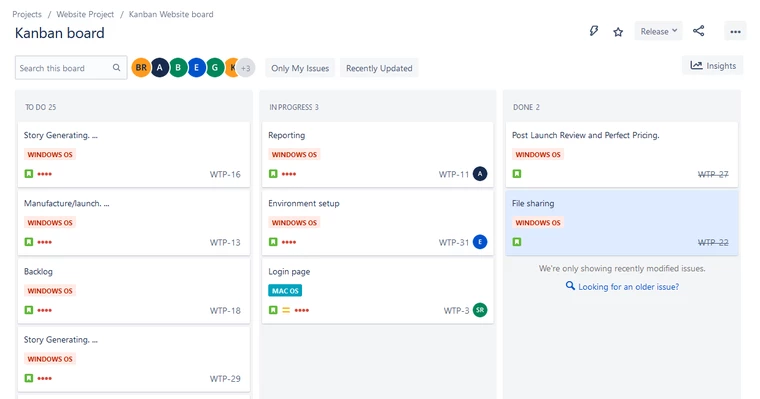
1. Use Agile Boards: If your teams follow Agile methodologies, leverage Jira's Agile boards, such as Scrum or Kanban boards, to visualize and manage work items. Organize tasks into sprints, set priorities, and track progress using burndown charts or cumulative flow diagrams. Agile boards provide transparency, facilitate collaboration, and promote iterative development.
2. Implement Effective Task Management: Use task management features to their fullest potential. Break down work into granular tasks, assign them to team members, and set clear priorities and due dates. Encourage teams to regularly update task statuses and provide meaningful comments to keep everyone informed about progress and any obstacles. Make users log time to track time effectively.

3. Monitor and Track Metrics: Leverage Jira's reporting and tracking capabilities to monitor team and project performance. There's a wide variety of useful reports that can help track users' progress. Track metrics like team velocity, cycle time, and burndown charts to gain insights into productivity, identify areas for improvement, and make data-driven decisions.

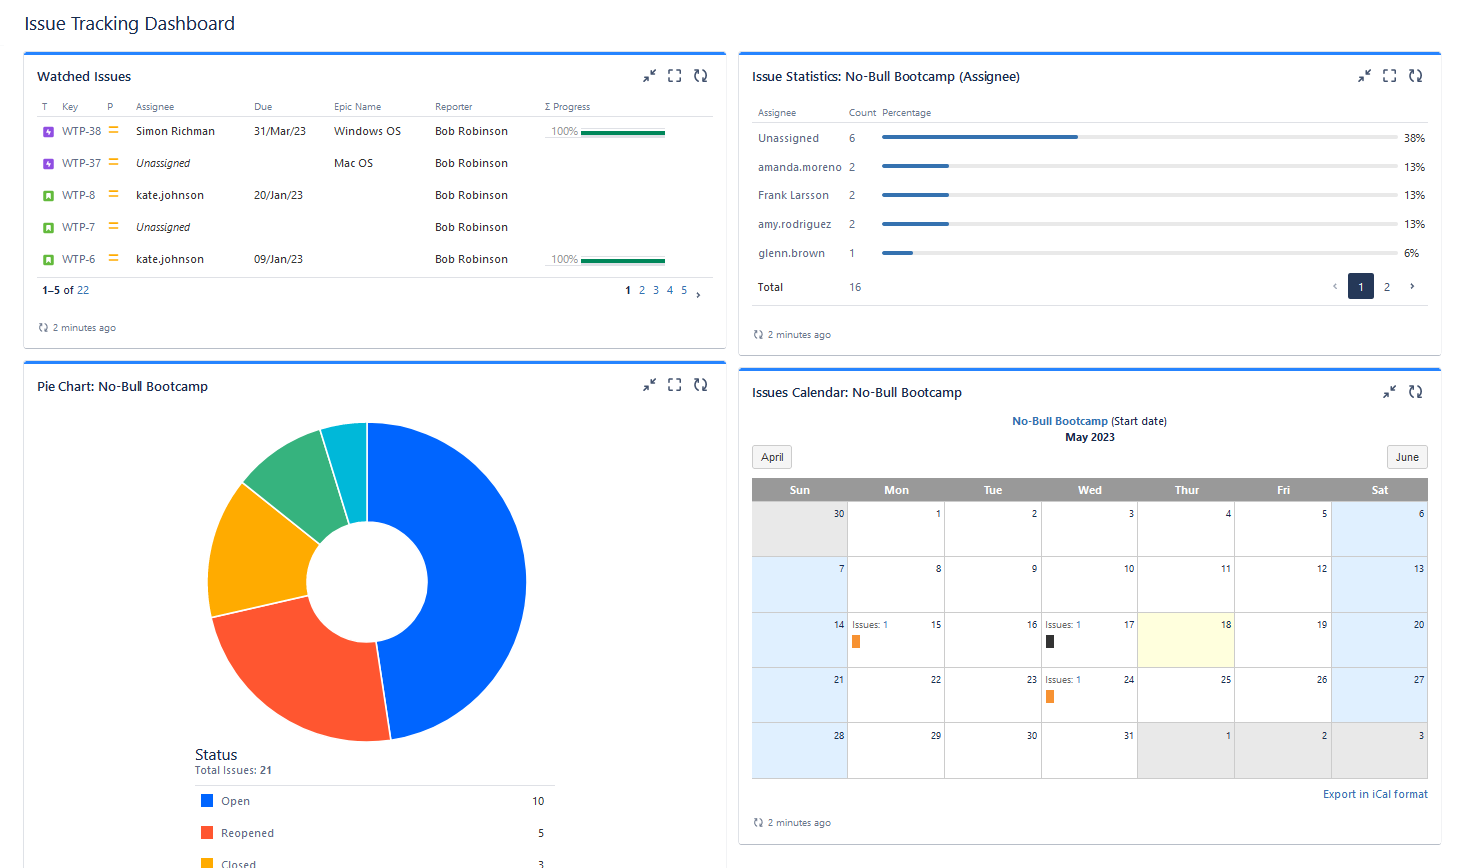
4. Use Jira Dashboards: Jira Dashboards are customizable visual displays that provide users with a consolidated teams view of relevant project information, metrics, and reports. These dashboards serve as centralized hubs of information, allowing teams and stakeholders to monitor project progress, track key performance indicators, and gain valuable insights at a glance.
5. Try 3d party add-ons: these add-ons provide extra functionality which can improve the workflow and make the process more efficient and can help teams save time and money by streamlining their activities. Benefits of adding add-ons include improved resource planning and team management, customized reporting, and timesheets.
Integrating Jira Teams with Other Tools: ActivityTimeline
For those who need advanced team management, there are numerous plugins presented in the Atlassian Marketplace. These add-ons can broaden users' capabilities and effectively supplement the planning process.
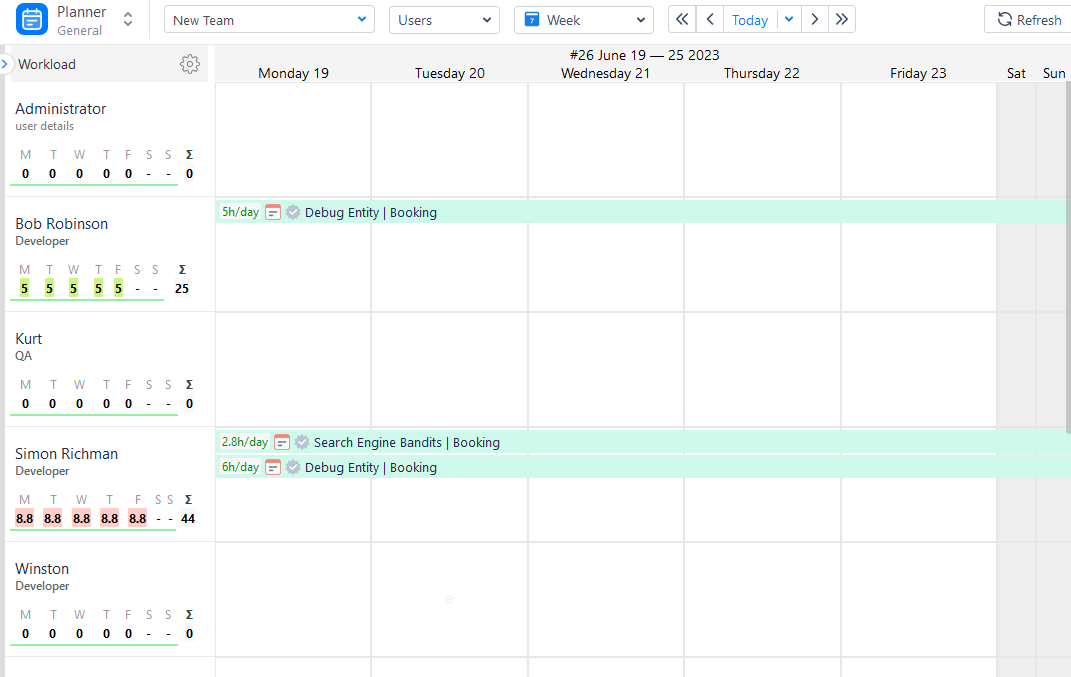
For example, you can check out an ActivityTimeline - a resource planning & tracking add-on with timesheets and reporting sections for teams. The app allows to plan and manage teams' and individual users' activities with the help of special timelines. See who is doing what and when it will be done with a special Planning Dashboard, that comprehensively shows all projects with tasks, as well as Team/User timelines with ongoing/planned activities. Users can log work here, schedule tasks with simple drag-n-drop, and simply track the progress. All data is fully synchronized with Jira, and vice versa. Every timeline provides a special workload indicator, that shows the user/team workload for a given period:

It’s very easy to add Jira Teams to ActivityTimeline. You'll need admin access. Follow the next instructions:
1. Go to the “Administration Menu” from the dashboard
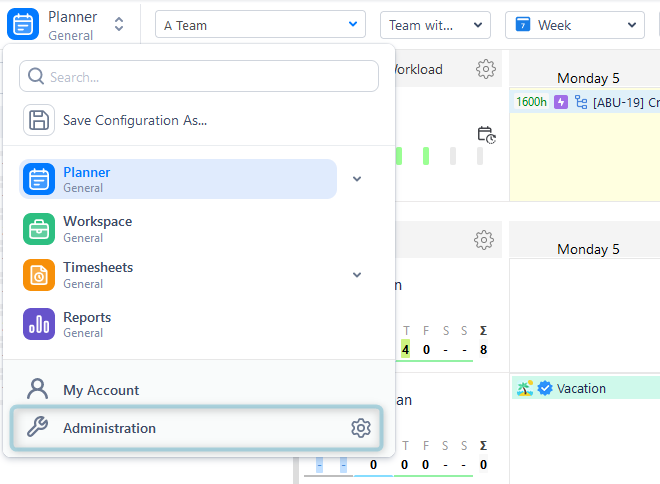
2. Click on “3d Party Integration” and choose “Jira Teams Integration”
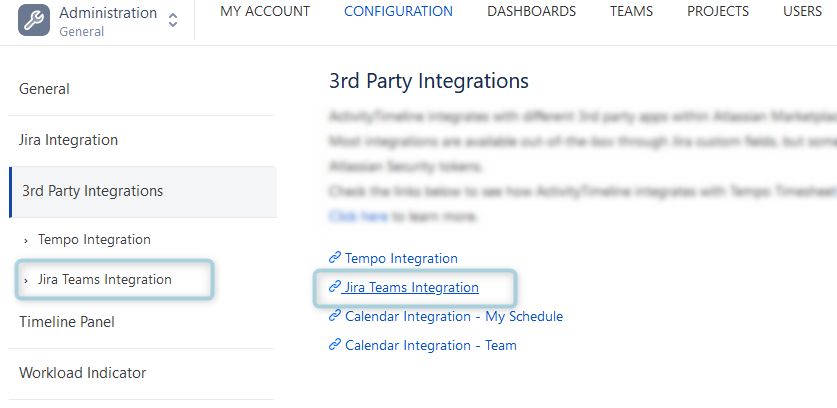
3. Provide your email and API token, and click “update'.
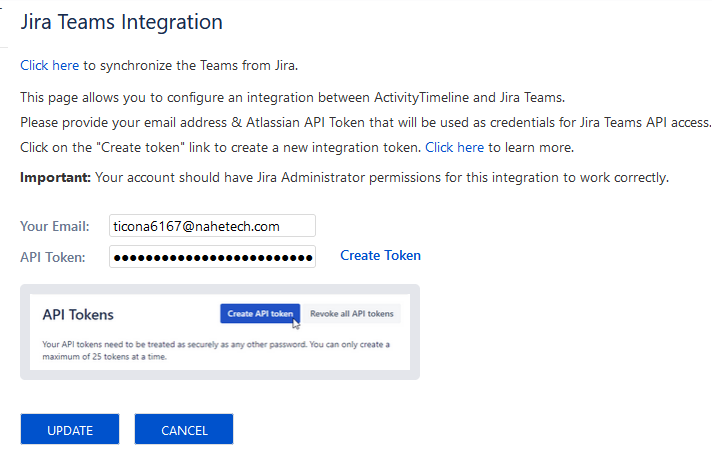
That’s it, your Jira Teams have been added to ActivityTimeline and you can start working!
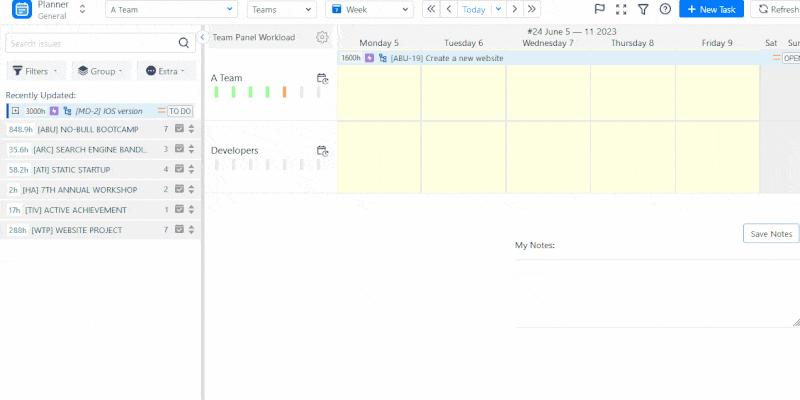
You have the option of choosing among various timeline views with the help of the separate Team Panel that can be depicted in either a fine or broad level of detail. By utilizing these timeline views, you can assign tasks to entire teams (such as epics and program increments), set due dates and approximations, and observe advancement. What's more, there are warning signs to display the total crew workload and accessibility:
ActivityTimeline offers advanced time-tracking features that allow users to keep tabs on the time spent on certain projects or tasks with the help of Timesheets. Additionally, timesheets can be created using the worklogs to include non-working days (e.g. holidays, sick days). This data can then be exported as an Excel file for further analysis.
The user interface of ActivityTimeline is simple and intuitive, providing various parameters to customize the timesheets.
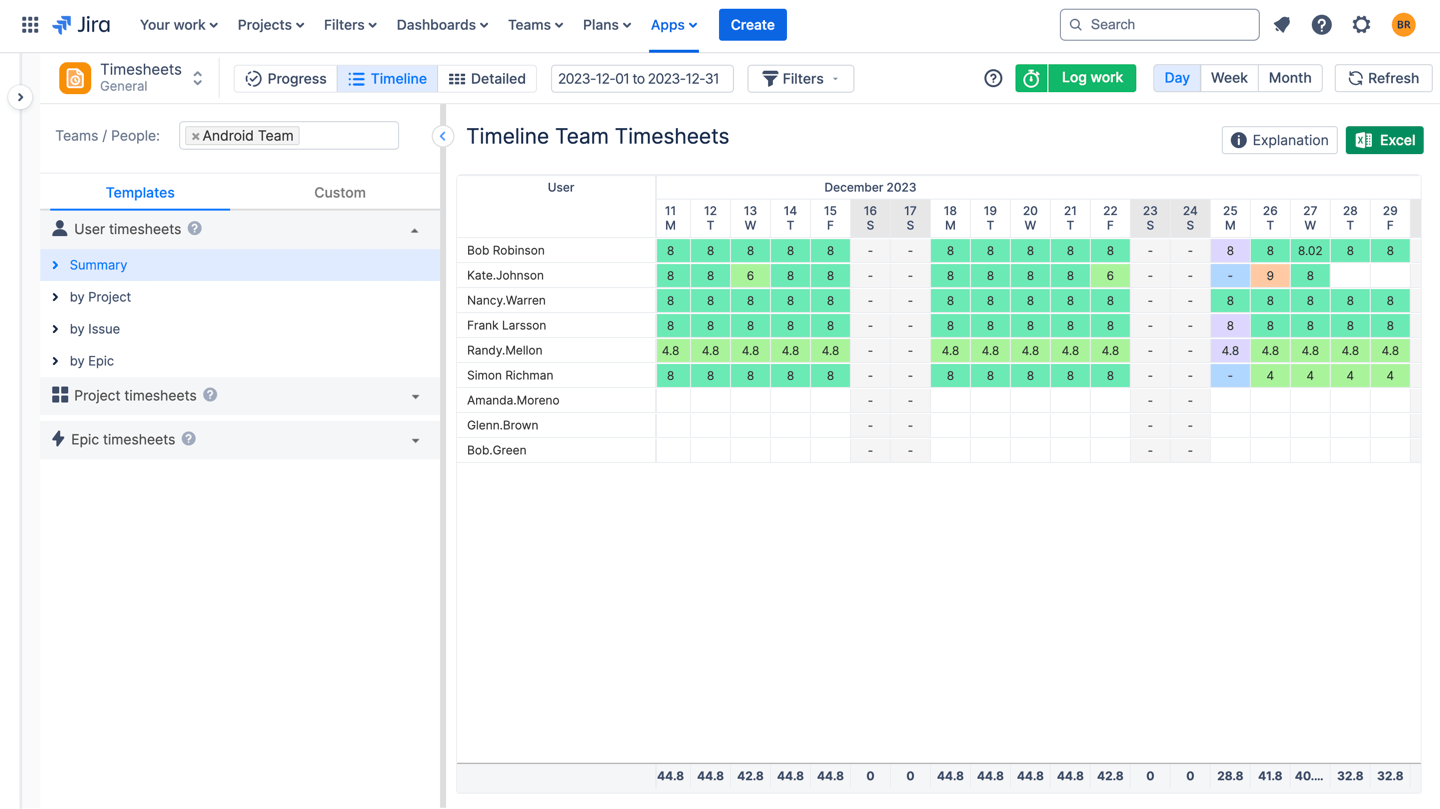
There are three different types of timesheets that users can employ within the app, each tailored to deliver different levels of detail: Progress Timesheets, Timeline Timesheets, and Detailed Timesheets. Consequently, project managers can track the progress of their tasks and identify any inefficiencies or bottlenecks along the way.
For more team progress insights, users are welcome to check the Reporting section, which provides dozens of useful, detailed team/user/issue/project reports to your choice:
For example, if you want to get an understanding of the resource utilization and whether you need additional resources to complete the project, you can generate a special report showing a utilization on both team and individual level for any period:

Users can generate reports in a few clicks and export them to Excel files immediately.
Here’s a little humble brag: our client Medtronic leveled up their project and resource management by ditching Excel and adopting ActivityTimeline.
Sebastian Quiroga, Business System Analyst at Medtronic, sums it up perfectly:
"Before, everything was done on Excel. It was pretty complicated for the planning, almost impossible to do..."
With features like vacation management and powerful reporting tools, Medtronic now effortlessly assigns tasks, tracks progress, and optimizes team capacity. Managers rely on timesheets for daily oversight, while leadership uses reports to keep things running smoothly. This shift has helped them boost productivity and manage their growing operations with ease!
Conclusion
Jira provides a comprehensive way of improving teamwork and project management through the platform. Organizations can use the many features and capabilities of the app to track work activities, optimize communication, and improve productivity.
With access to customizable dashboards, task administration solutions, plugins, and immediate updates, teams are able to stay organized, monitor progress, and make informed decisions on whether they need additional resources. Jira creates a concentrated system where members of a team can unite, pass on knowledge, and attempt to meet project objectives.


.png)


