
Tracking time is table stakes.
But simply counting hours isn't enough to understand where your business is going. Modern teams need deeper insights into how time is spent to make smarter, data-driven decisions.
This is where advanced time and worklog tracking in Jira becomes a powerful tool. By moving beyond the binary of "billable" vs. "non-billable," you can categorize time entries with a level of granularity that transforms raw data into a strategic asset.
This article will explain how you can leverage custom worklog categories in Jira using the ActivityTimeline app to gain a competitive edge. This is not just a feature lifted by community discussions but a fundamental shift in how you analyze project performance.
{{tl-dr}}
The Problem with Simple Time Tracking
Historically, logging time in Jira has been a necessary but often cumbersome process. For many teams, it's a simple, manual entry of how much time was spent on a task. But this approach offers little in the way of detailed information.
Imagine trying to understand a project's profitability when the only distinction is between billable hours and non-billable hours. You know a developer spent 10 hours on a task, but was that time spent coding a new feature, fixing a bug, or providing an internal demo?
This lack of context makes it difficult for a manager to accurately forecast future projects, justify budgets to clients, and properly credit employees for their work. It's a problem ActivityTimeline solves by allowing you to define and apply powerful, descriptive categories to every single work log entry.
Setting Up Your Custom Worklog Categories
Creating custom categories is a straightforward process that puts you in complete control of your time tracking data. It’s an easy way to ensure your timesheets reflect the unique nature of your business.
To begin, you need to navigate to the Timesheets Configuration page in the ActivityTimeline app.
Step-by-Step Guide to Creating a New Category
- Go to Jira Settings and select Apps.
- Find the ActivityTimeline application and click on Configuration.
- In the left-hand menu, choose Timesheets Configuration.
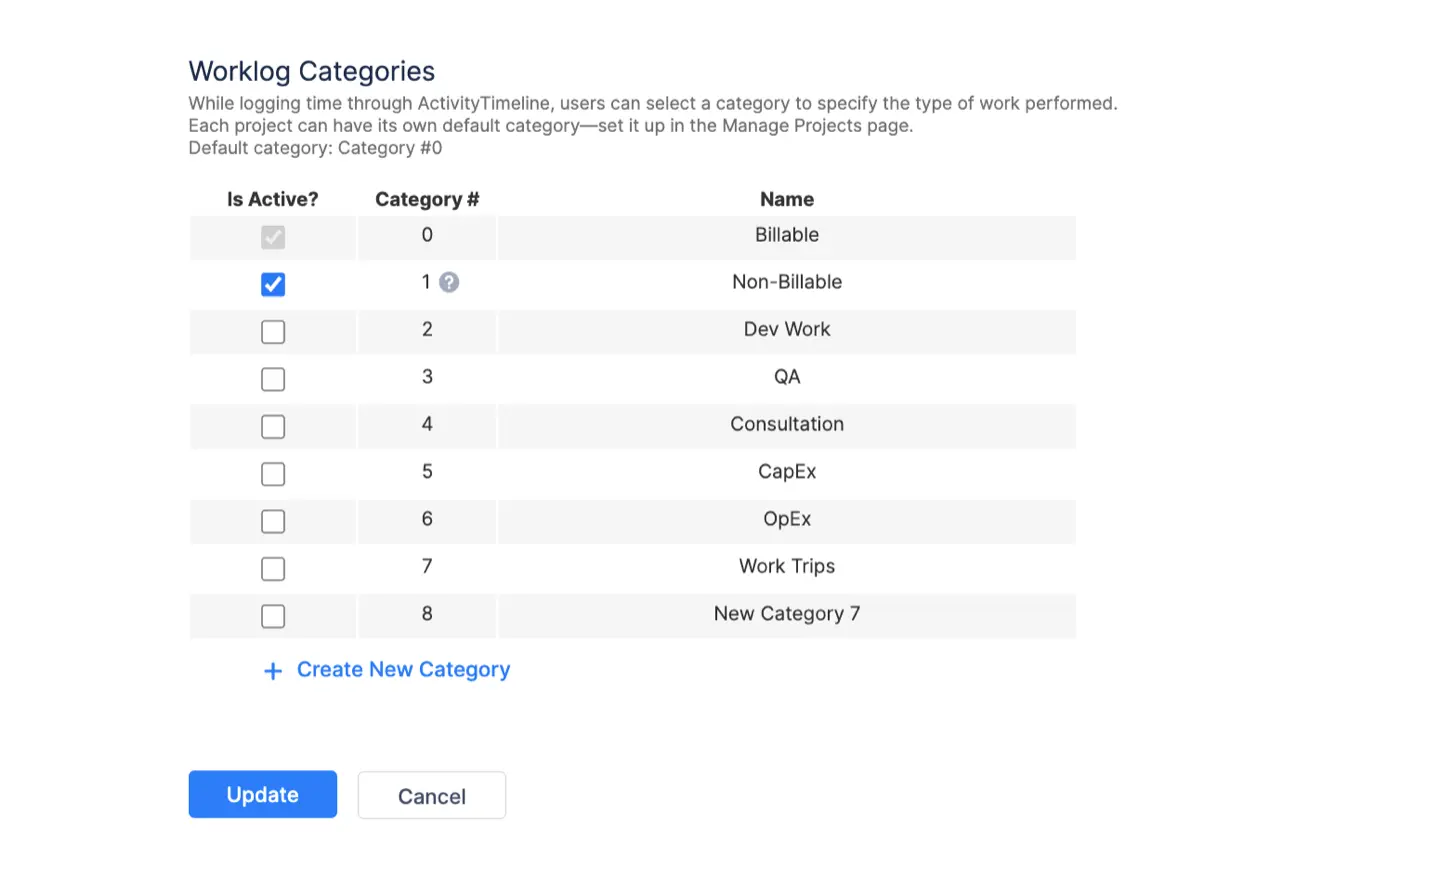
- Scroll down to the Worklog Categories section, where you will see the existing list of categories.
- To create a new category, click the "+ Create New Category" button at the bottom of the table.
- A new entry will appear. Provide a descriptive name for your category (e.g., "Development," "QA," "Marketing," or "Overtime").
- Optionally, you can choose an icon to visually represent the category.
- Click the Update button at the bottom of the page to save your changes and make the new categories available to your team.
- These new categories will automatically appear as new options in a single select dropdown when a user logs work. You can create up to 100 custom categories to perfectly match your team's workflow.
Using Worklog Categories in Practice
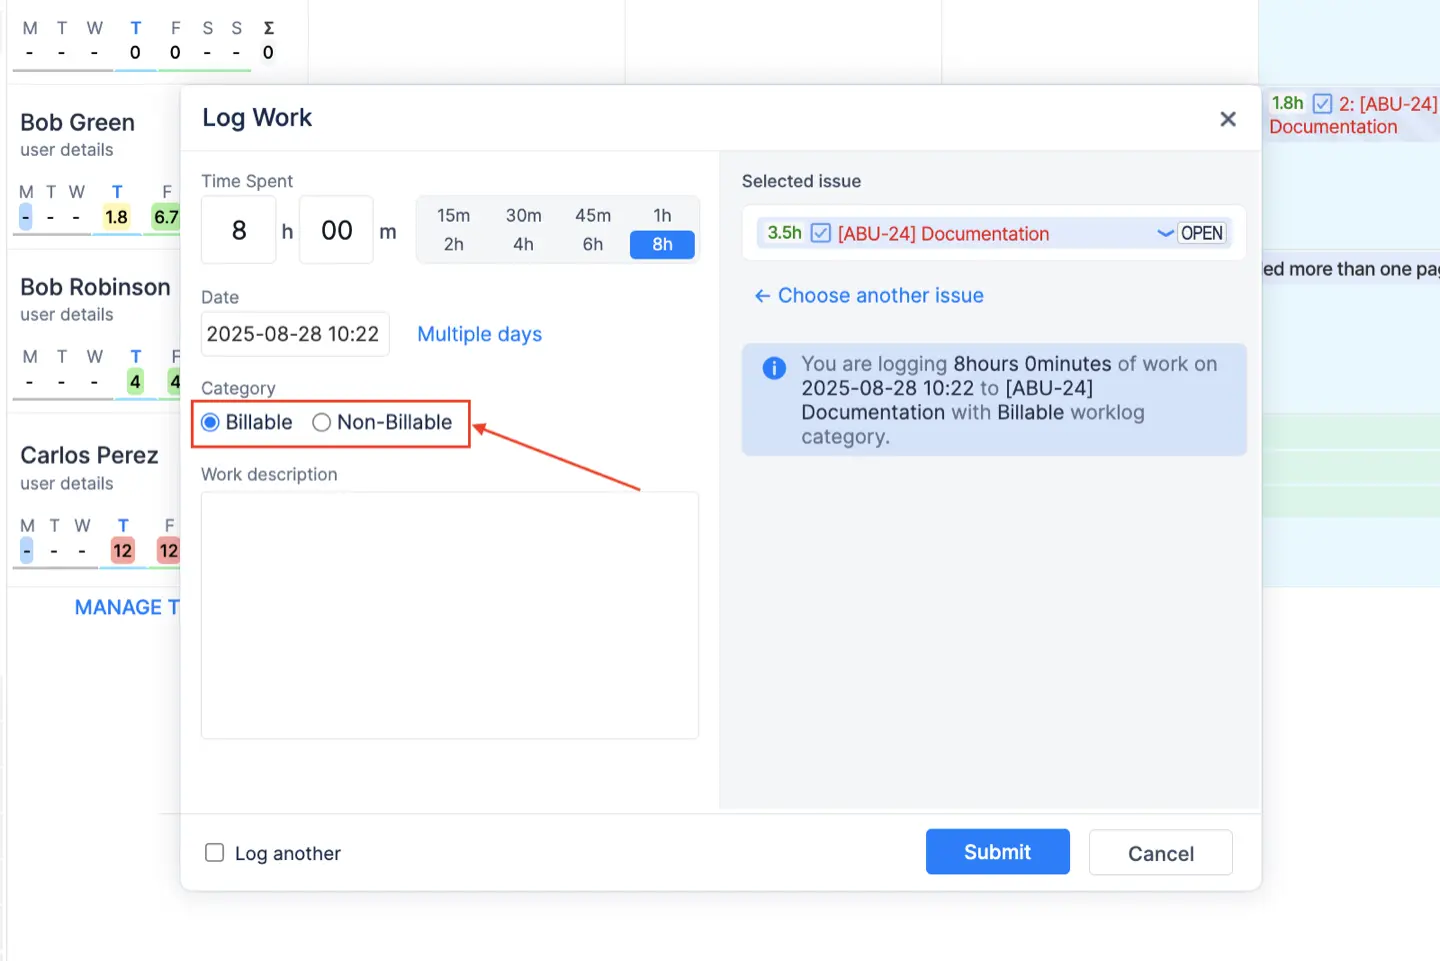
Once your categories are configured, using them is simple and intuitive. When an employee logs time spent on a task, they select the relevant category from a dropdown menu.
In ActivityTimeline’sLog Work dialog, which can be accessed from the Planner, Workspace, or directly in Jira, the user will find the new categories ready for use.

This small step makes a huge difference. For testing purposes, a QA engineer can log 4 hours under the "QA" category, while a marketing specialist logs 2 hours under the "Marketing" category for a task within the same project. This provides a rich layer of data that simply isn't possible with basic time tracking.
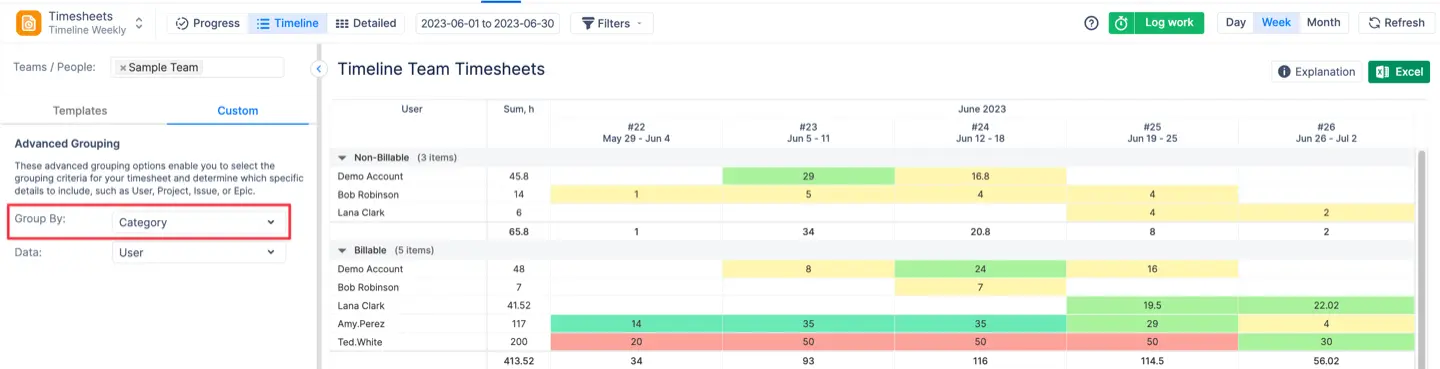
Later, a manager can group and analyze hours by these categories in detailed timesheet reports to gain insights into how time is being spent across different types of work.
It is possible to generate Timeline & Detailed Timesheet reports and group the data by Category so that you can understand how much time is getting consumed by each type of work. Go to Timesheets → Open Timeline or Detailed view → Custom → In ‘Group by’ drop-down choose ‘Category’:
Configuring Non-Jira Events as Worklogs
Not all important work happens on a Jira task. Project-related meetings, client calls, and training sessions are essential activities that should be reflected in your timesheets. ActivityTimeline provides a powerful solution by allowing you to treat "Booking" events as worklogs.
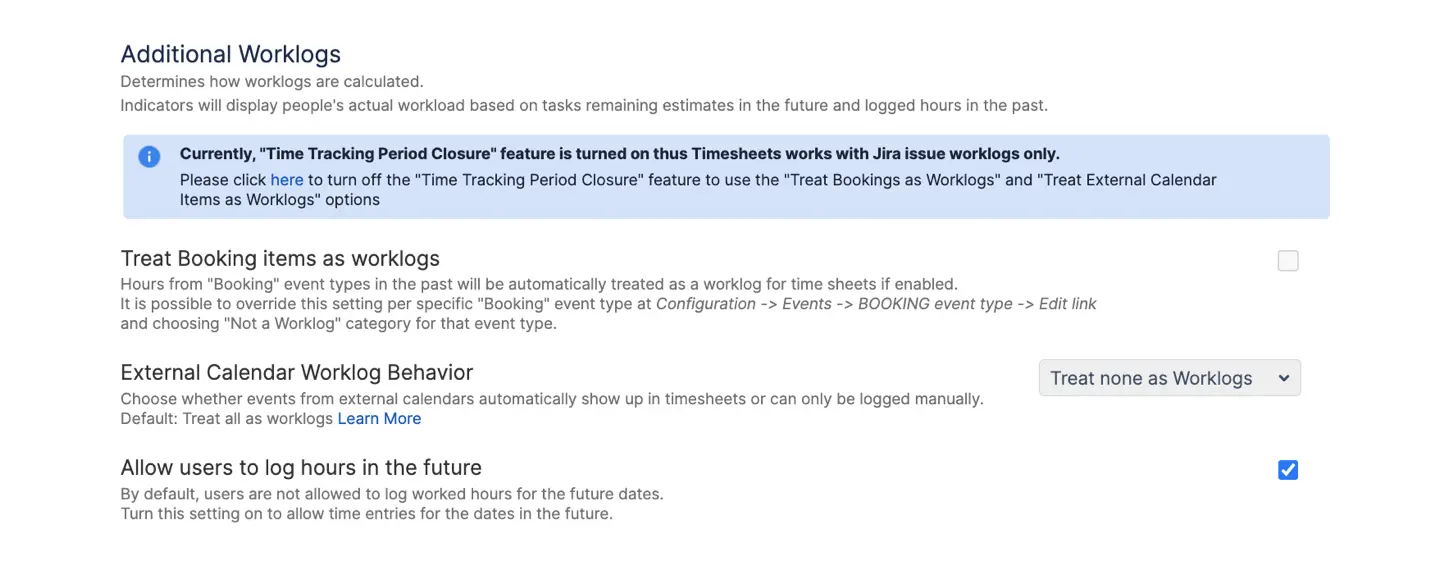
You can enable or disable this setting from the Timesheets Configuration page. With this option enabled, any hours allocated through a Booking event in the past will be automatically treated as a work log for your timesheets. This feature is invaluable for capturing a complete picture of an employee's contributions, even for tasks not linked to a Jira ticket.
For example, a team lead can create a "Booking" event for a 2-hour strategic planning meeting and mark it as a worklog. This time spent will then appear in their timesheet report alongside hours from regular Jira issues, providing a comprehensive view of their week.
If you need to use a "Booking" event for other planning purposes, and do not want it to be included as a worklog, you can override this behavior. Simply edit the specific event type and set its worklog category to "Not a Worklog".
Conclusion
The ability to customize worklog categories is a strategic advantage for any organization using Jira. It moves your time tracking from a simple administrative burden to a tool for deep analysis. With ActivityTimeline, you can effortlessly configure, apply, and report on these categories across your multiple teams.
By treating every logged hour as a rich data point, you empower managers to make better decisions about resource allocation and project profitability. This advanced approach ensures you always have a clear, accurate understanding of where your team's time is invested, giving you the insights you need to succeed.