{{tl-dr}}
In Agile project management, real-time data is everything. Teams live and die by their ability to trust what they see on their screens. For most Jira integrations, data is synchronized by periodically polling Jira for changes. While this works well for new or updated tasks, it often creates a critical blind spot: deleted items. Webhooks allow you to respond instantly when an event occurs in Jira, ensuring your information is always up-to-date.
A user deletes an issue in Jira, but your connected tool still displays it, leading to confusion and manual cleanup. This is a breakdown in data consistency that can ruin your plans and trust in your tools. ActivityTimeline solves this problem with webhooks, an advanced yet simple-to-configure feature that ensures your data is always perfectly in sync, especially for deletions. You can integrate Jira Software Cloud with webhooks to automate data synchronization and eliminate manual intervention. It's easy to connect Jira Software Cloud with ActivityTimeline using webhooks for seamless integration. Webhooks in Jira Software Cloud provide a robust, event-driven integration.
Prerequisites: Your Email and an API Token
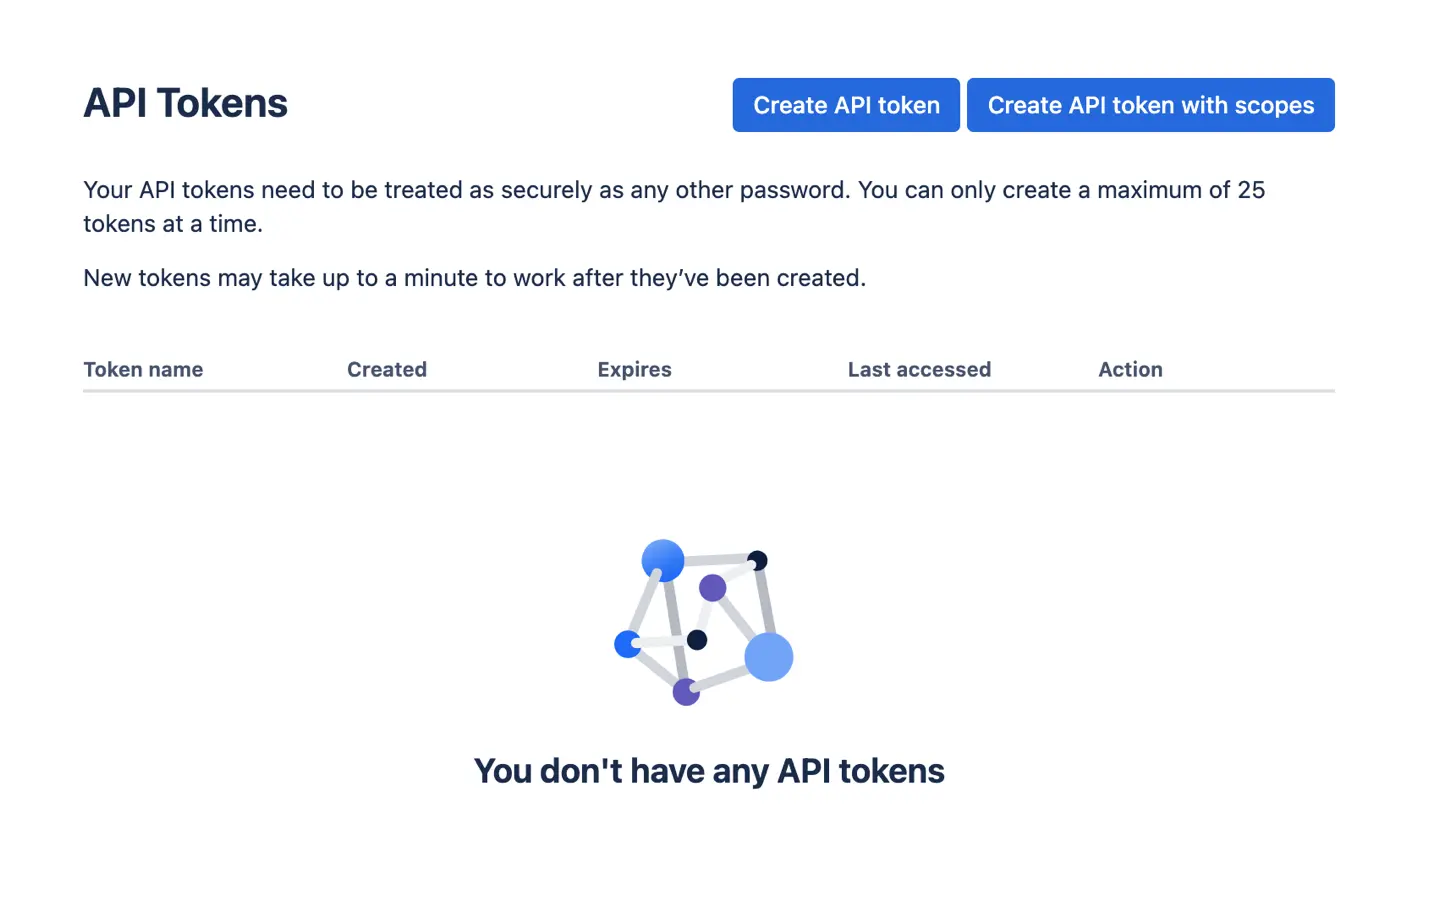
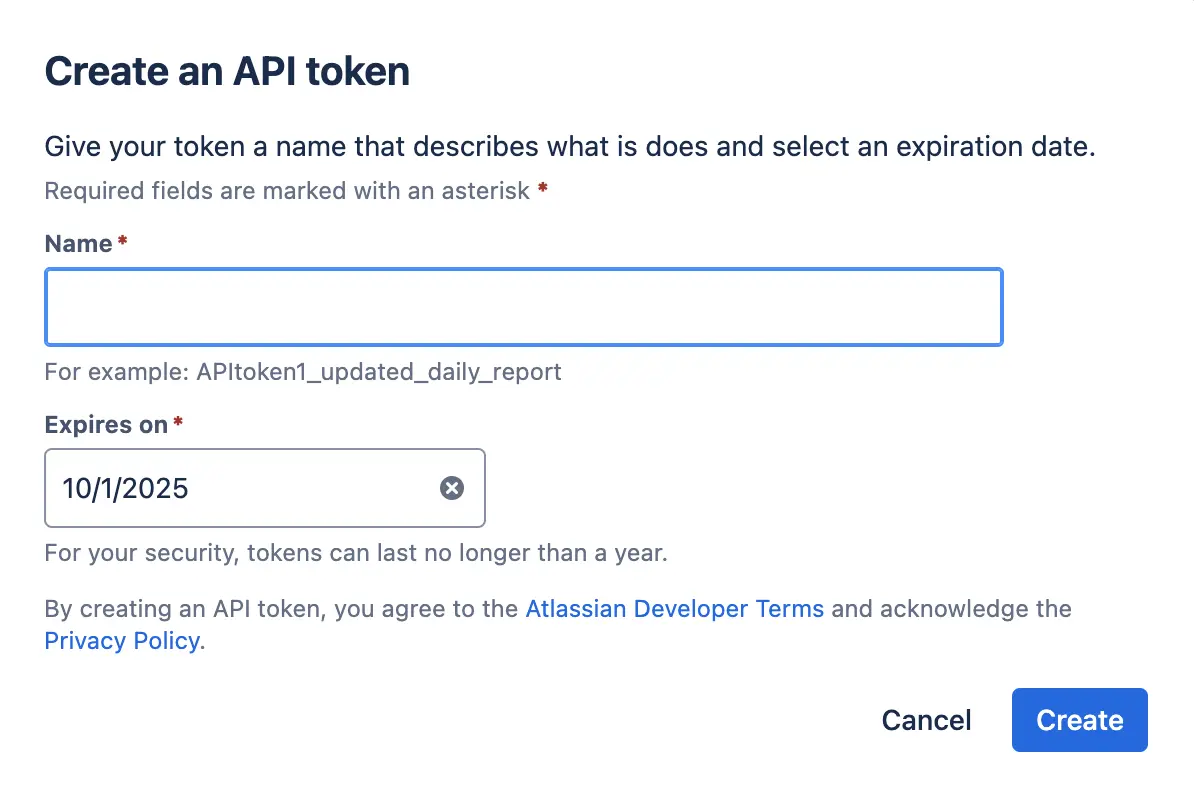
Setting up Jira webhooks is a straightforward process that requires only two things: your email address and an API token. An API token acts as a secure password, allowing ActivityTimeline to access your Jira instance with the necessary permissions. For security reasons, API tokens are required to ensure only authorized systems can access your Jira data. The API token is included in the authorization header of each request to authenticate and secure the integration. You can easily generate a new token from your Atlassian account page, ensuring that the connection is secure and private. It’s an essential best practice for any modern cloud integration, and this process makes it seamless.
The Problem with Manual Deletion
If webhooks are not configured, and a user deletes an issue in Jira, that item can still appear in ActivityTimeline’s cache. Without webhooks, other important events such as a new comment being added to an issue may also be missed, leading to incomplete data in ActivityTimeline. While you can manually remove a deleted ticket one by one from the Maintenance Page, this is a cumbersome and inefficient workaround. The support team consistently recommends setting up webhooks as the long-term solution to avoid such tedious manual work in the future.
Step-by-Step Guide to Configuring Webhooks
ActivityTimeline’s webhook configuration is designed to be accessible even to those who aren’t Jira REST API experts.
- Navigate to the Right Panel: In ActivityTimeline, navigate to Configuration and then Jira Integration. From there, locate the Webhooks Config tab.
- Add Your Credentials: In the configuration screen, you will be prompted to enter your email and the API token you generated. The system requires an API token to create the necessary callbacks in your Jira instance on your behalf.
- Create the Webhooks: Click the ‘Add Webhooks’ button. If you have reached the maximum number of webhooks allowed in Jira Cloud, you will need to remove existing webhooks before creating new webhooks. This single action creates two distinct webhooks within your Jira instance. When you create a new webhook, you can specify a callback URL to receive real-time notifications from Jira.
Apps can register webhooks using Jira's REST APIs by sending requests to the following URL endpoints. You can use the following methods to register, update, or delete webhooks, and sample code is available for these operations. You can check the webhook log in Jira Cloud to review delivery attempts and debug issues. Webhooks enable your web application to synchronize data with Jira Software Cloud in real time, making it easy to automate workflows in Jira Software.
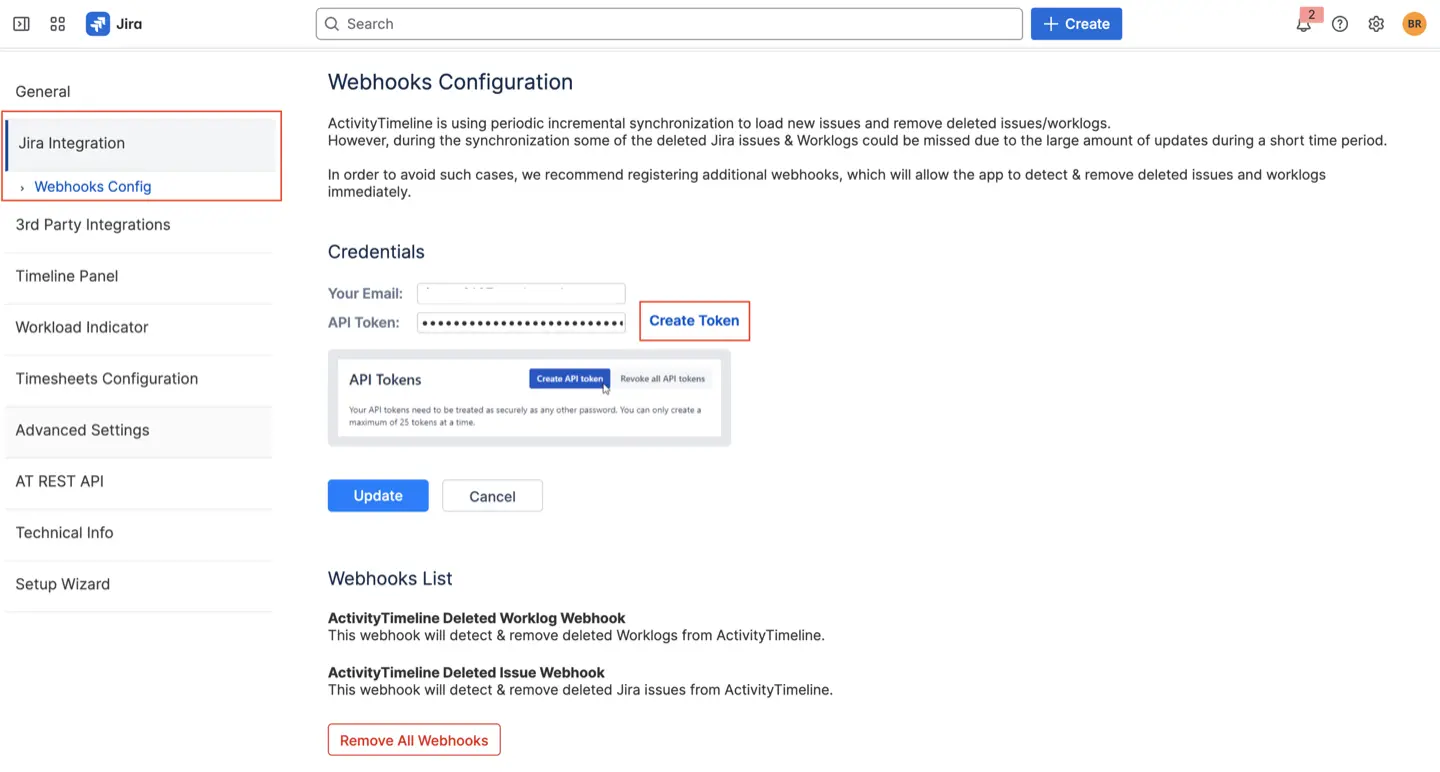
On the picture above, you can see two webhooks created to enhance ActivityTimeline issue updates:
- ActivityTimeline Deleted Issue Webhook. This webhook is specifically designed to detect and remove deleted Jira issues from ActivityTimeline’s cache immediately upon deletion in Jira. You can filter webhooks by the issue related events section to target only issue related event types, such as issue creation or updates.
- ActivityTimeline Deleted Worklog Webhook. This webhook performs the same function for worklogs, ensuring that any deleted time entries are instantly removed from your ActivityTimeline dashboards and reports.
Once this configuration is complete, all issues and worklogs will be removed from ActivityTimeline right after they have been deleted from your Jira instance. This is the permanent and recommended solution for preventing stale data from cluttering your view.
{{rich-cta-3}}
Managing Webhooks in Jira Cloud
Managing webhooks in Jira Cloud is essential for maintaining a reliable and efficient integration with your other tools and services. To manage webhooks, users can access the Jira Administration Console, where all existing webhooks are listed for easy review. From this interface, you can view, edit, or delete webhooks as your integration needs evolve. For those who prefer automation or need to manage webhooks at scale, the Jira REST API offers a powerful way to create, update, or remove webhooks programmatically, ensuring your integrations remain up to date with minimal manual intervention.
Regularly reviewing your webhooks in Jira Cloud helps prevent issues such as duplicate notifications or outdated integrations. Jira provides robust features for managing webhook events, including retry policies and concurrency limiting, which help ensure that your webhooks deliver data reliably even under heavy load. By taking advantage of these management tools, users can keep their Jira integrations running smoothly and securely, making the most of what webhooks in Jira have to offer.
Automating Webhooks for Seamless Workflows
Webhooks can be used outside ActivityTimeline as well. Automating webhooks in Jira can transform your workflow by reducing manual effort and ensuring that critical actions happen exactly when needed. Jira allows users to configure webhooks to trigger automatically when certain events occur, such as issue creation, updates, or transitions. By leveraging workflow post functions and automation rules, you can set up webhooks to send real-time notifications, update external systems, or kick off additional processes whenever a specific event takes place.
For example, you might automate webhooks to alert your sales team when a high-priority issue is assigned, or to update a remote application whenever a workflow transition is completed. This level of automation not only saves time but also ensures that your workflows remain consistent and error-free. By configuring webhooks to respond to the events that matter most, users can build seamless, integrated workflows that keep projects moving forward efficiently.
Advanced Webhook Configuration Tips
For users looking to get the most out of their Jira webhooks, advanced configuration can make a significant difference. Start by ensuring your webhook URL is correctly formatted and uses secure protocols to protect your data. When configuring webhooks, you can use JSON callback requests to send detailed data to your webhook URL, allowing remote applications to process information in real time.
It’s also important to carefully select which events and filters your webhook should respond to, so you only trigger actions for the most relevant changes. For more complex needs, the Jira REST API enables you to configure and manage webhooks programmatically, giving you full control over your integration. Additionally, take advantage of advanced features like concurrency limiting and retry policies to manage webhooks effectively, ensuring that your requests are handled reliably even during peak activity. By following these tips, users can configure webhooks that are both powerful and secure, tailored to their unique workflow requirements.
Integrating Jira Webhooks with Other Tools
Jira webhooks are a powerful way to connect Jira with the rest of your software ecosystem, enabling you to synchronize data and automate workflows across multiple platforms. By configuring webhooks to send data to other applications—such as project management tools, customer support systems, or marketing automation platforms—you can ensure that everyone stays informed and that processes move forward without manual intervention.
For instance, you can use Jira webhooks to automatically update a Salesforce record when a Jira issue changes status, or to trigger a deployment in GitHub when a workflow transition occurs. This seamless integration allows users to synchronize data between Jira and other tools, creating powerful workflows that eliminate silos and boost productivity. By leveraging Jira webhooks to connect your favorite apps, you can automate routine tasks, keep your teams aligned, and ensure that your project data is always up to date.
Conclusion
Setting up webhooks in Jira is a best practice that brings a new level of data integrity to your Agile project management workflow. By enabling this feature, you move from a periodic, and sometimes flawed, synchronization process to an intelligent, event-driven system. This ensures that every action taken in your Jira instance—especially deletions—is instantly and accurately reflected in ActivityTimeline, giving your team a single, reliable source of truth.
Don't let stale data slow you down. A few minutes of configuration today can save countless hours of manual cleanup tomorrow, guaranteeing your Jira integration is as robust as your projects.
{{rich-cta-4}}