
This guide is your fast track to mastering the essentials, designed to get your capacity planning up and running without getting bogged down in complex configurations. Your primary goal as a manager is to allocate resources efficiently and keep projects on track. We will walk you through the four key steps to achieve that with confidence.
Step 1: Configure Your Teams and Users
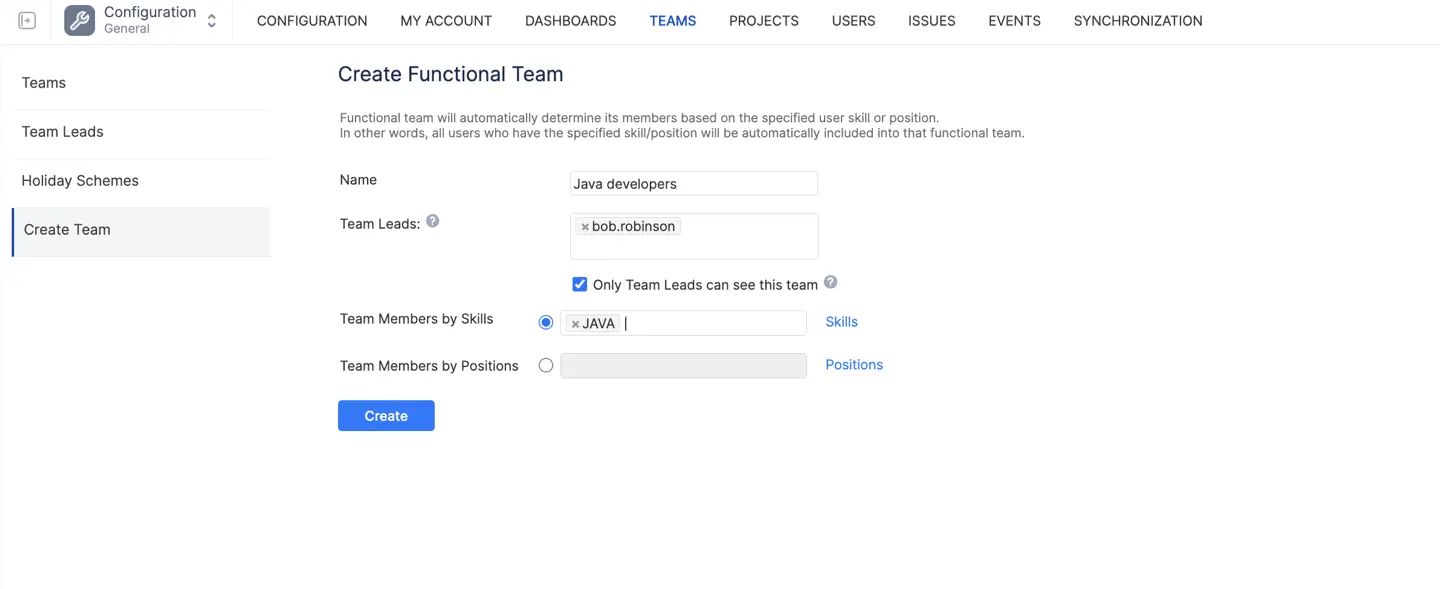
The foundation of effective resource management starts with a well-structured team. Navigate to the ActivityTimeline app in your Jira and head over to the Configuration > Teams page to begin.
- Create Teams: You have a couple of options here. The simplest way to start is with a Classic Team, where you manually select team members. Alternatively, for a more dynamic approach, you can create a Functional Team that automatically groups people based on their skills or positions. This is ideal for managing cross-functional teams or for organizing your team by location. ActivityTimeline also allows you to import teams directly from Jira groups or Jira Teams if you're on Jira Cloud.
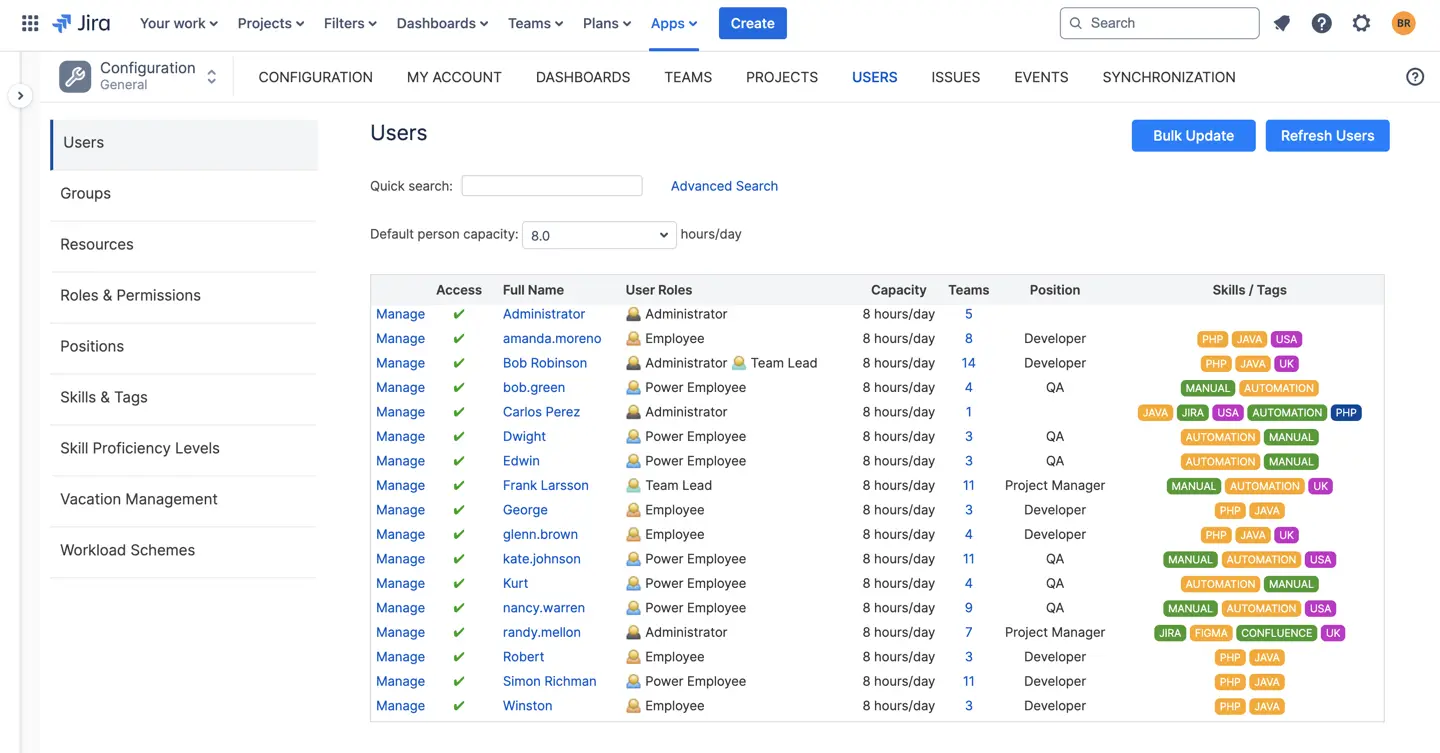
- Assign Roles and Skills: In the User Management section, you can define your team's specialties. Assigning users to roles, positions, and skills enables smarter planning. For example, you can assign roles like "Admin" or "Planner" to control access levels. You can also map custom fields from Jira to ensure all relevant user data, like start and end dates, are reflected in ActivityTimeline.
If you're facing issues with tasks not appearing, a good first step is to check if the Jira connection is properly configured and to hit the "Refresh" button in the Planner view for an instant update.
{{rich-cta-3}}
Step 2: Navigate the Planner
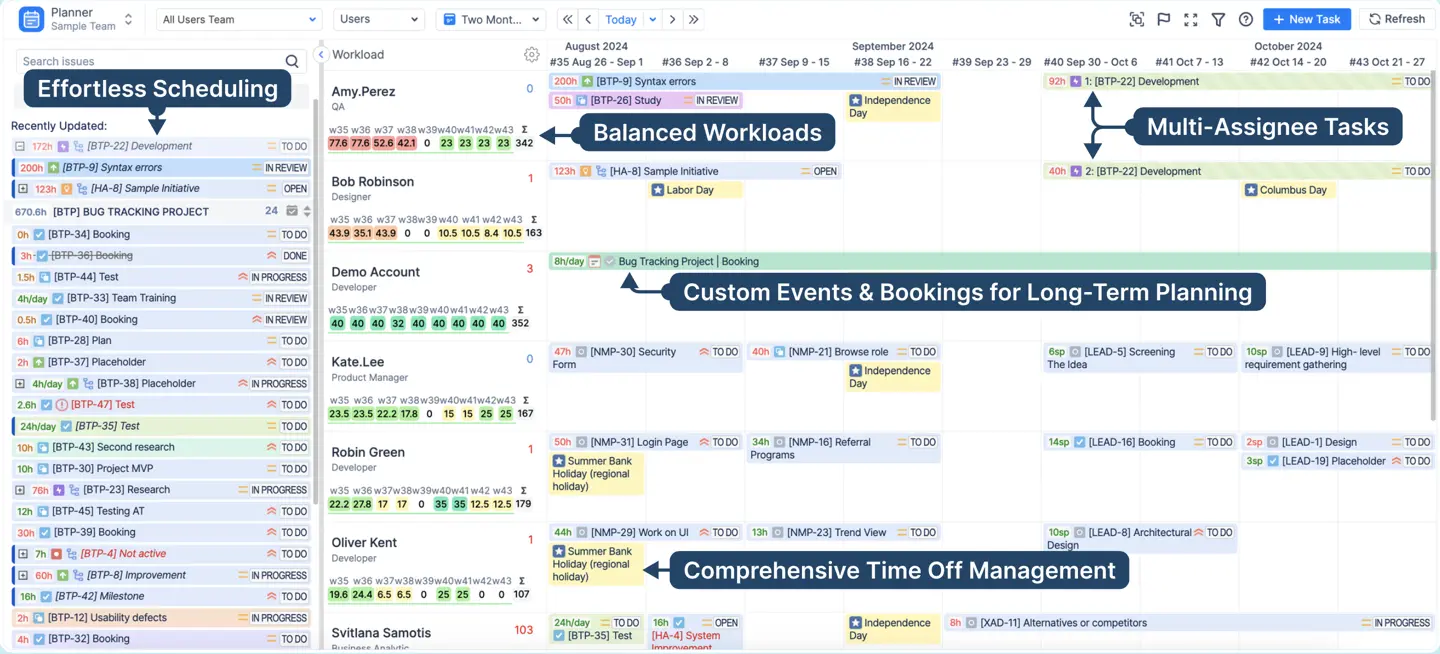
The Planner module is your central hub for day-to-day workload management and resource allocation. This is where you'll spend most of your time.
- Visualize Your Team's Workload: The Planner offers a comprehensive overview of your team's workload. You can easily switch between different teams or even get a cross-project view of multiple teams.
- Assign Tasks with Ease: The tasks from your Jira projects appear in the left-hand Issue Panel. Simply drag and drop issues from this panel onto a team member’s timeline to assign them. This action will automatically update the task's assignee and dates in Jira.
- Leverage Workload Indicators: The Workload and Availability Indicator, displayed next to each team member's name, provides real-time insights into resource capacity. Colored indicators (green, yellow, or red) quickly tell you if a user is at capacity, under utilized, or overbooked.
- Plan Beyond Jira Issues: You can create custom events like Bookings and Placeholders for activities that aren't formal Jira issues, such as internal meetings or tentative planning. This ensures a complete and accurate picture of an employee's time.
To assign a single task to multiple projects, you'll need to enable splitting and assign it to the various users.
Step 3: Monitor Progress with Timesheets
The Track module is where you go to monitor your team's progress and ensure accountability using timesheets.
- Review Time Entries: Here, you can review required hours, workload hours, and the completeness of timesheets for any given period.
- Choose Your View: ActivityTimeline offers three distinct views to analyze your data:
- Progress View: Provides a high-level snapshot of logged hours versus expected hours.
- Timeline View: A visual, color-coded breakdown of time entries that helps you spot over- or under-logging patterns.
- Detailed View: Gives you a granular look at individual worklogs, including the user, project, and time spent.
For managers who need to approve time, the timesheets module makes this process seamless. You can review entries, confirm work hours, and approve timesheets to lock them from further edits.
Step 4: Use Reports for Strategic Insights
The Reports module is your source for high-level workload analysis and strategic planning.
- Generate Powerful Reports: ActivityTimeline comes with a wide range of reports to help you forecast and assess performance.
- Resource Utilization Forecast: Get a clear picture of how your project resources are planned to be used over time to identify if your team is over- or under-allocated.
- Planned vs Actual Report: Compare initial task estimates with actual time logged to understand project deviations and improve future planning.
- Leave Report: An essential report to see all types of leave your team has taken, which is critical for long term planning.
- Refine Your Data: Every report can be customized by selecting a timeframe, team, and project. You can also apply a Jira filter to dive deeper into the specific data you need to analyze.

This structured approach gives you a complete overview of your team's activities and capacities, allowing you to move from reactive management to proactive leadership, ultimately driving team productivity and achieving project goals.
{{rich-cta-5}}