
Jira timeline tools are especially valuable for agile teams, as they facilitate quick adaptation and real-time tracking, making dynamic project management easier. To deliver projects on time, you must decide between a task-centric approach and a resource-centric approach.
{{key-takeaways}}
Introduction to Jira Timelines
A Jira timeline is a powerful visual representation of your project’s schedule, designed to help project managers and teams stay on top of every detail. By mapping out key milestones, deadlines, and task dependencies, a Jira timeline provides a clear overview of project progress and helps identify bottlenecks before they become critical issues. This timeline view enables project managers to track progress across multiple projects, ensuring that all team members are aligned and working toward shared goals.
With a Jira timeline, you can easily visualize the sequence of tasks, understand how dependencies impact your schedule, and make informed decisions to keep your project on track. Whether you’re managing a small team or coordinating a large-scale initiative, the ability to see your project’s status at a glance enhances collaboration, supports effective project management, and ensures that important deadlines and milestones are never missed.
Why Do Standard Jira Views Lead to Planning Failures?
As a department head or project manager, you have likely experienced the invisible overload phenomenon. You create a perfect plan in a roadmap tool, only to find that your lead engineer is assigned 60 hours of work in a single 40-hour week. Monitoring and balancing team members' current workload is essential to optimize task distribution and prevent overloading individuals.
The primary problem with traditional task-centric planning is that it treats time as an infinite resource. When you plan without a clear view of team capacity, your projects are doomed to face:
- Burnout and Turnover: Constant overallocation leads to team fatigue, which is often only discovered after a project has already stalled.
- Spaghetti Schedules: High-level roadmaps often become a mess of overlapping bars, making it impossible to see individual availability across multiple projects.
- Milestone Slippage: Without accounting for vacations, sick leaves, or public holidays, your delivery dates are based on a “perfect world” that does not exist.
If you are managing cross-project resources, a simple task list is a liability. You need a single source of truth that balances work items against the actual human beings performing them, helps allocate resources efficiently, and distributes new work pieces based on current workload and team availability.
Comparing the Contenders: Which Tool Fits Your Workflow?
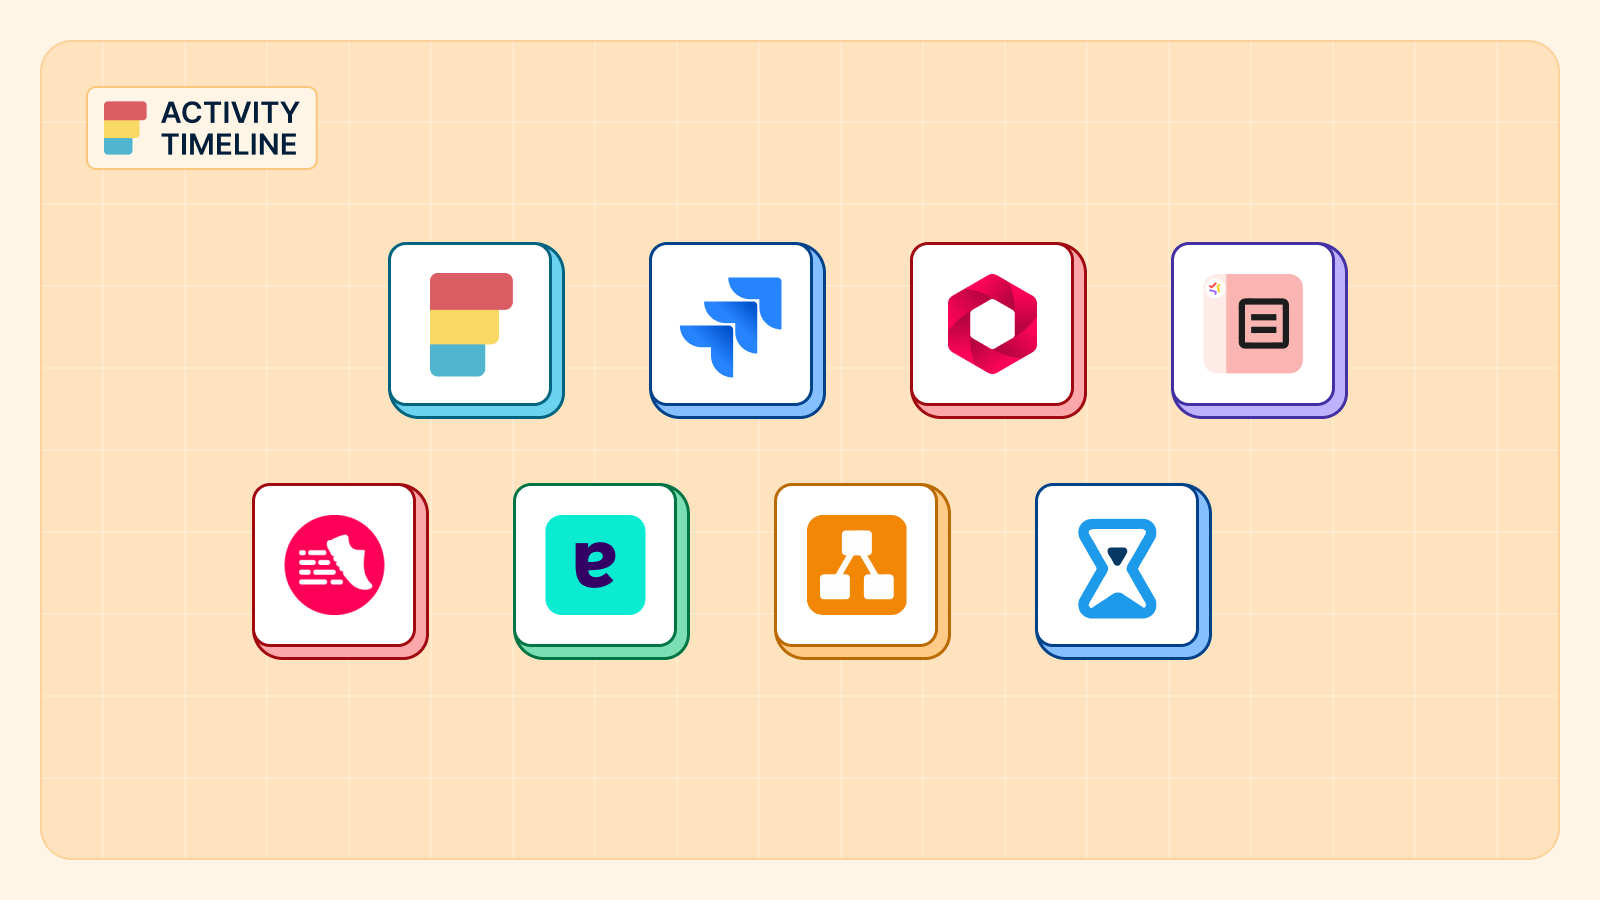
To help you choose the right solution, we have compared the three most popular planning methodologies in the Atlassian ecosystem. We highlight the key features of each tool, such as multi-project planning, resource management, and scenario planning, to show how they address different team needs.
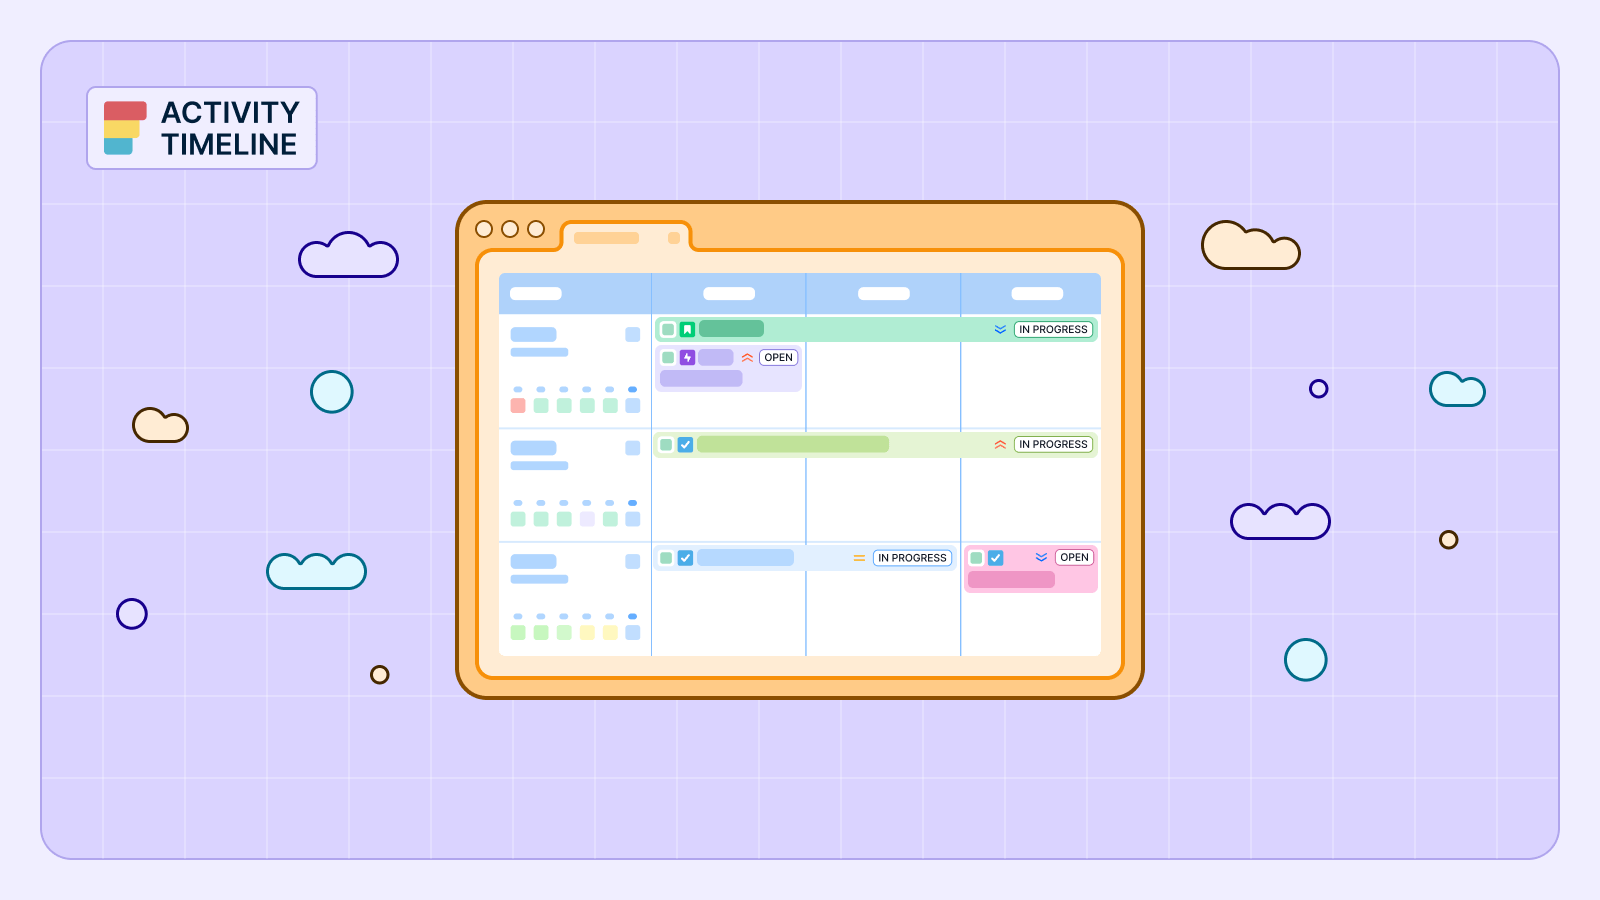
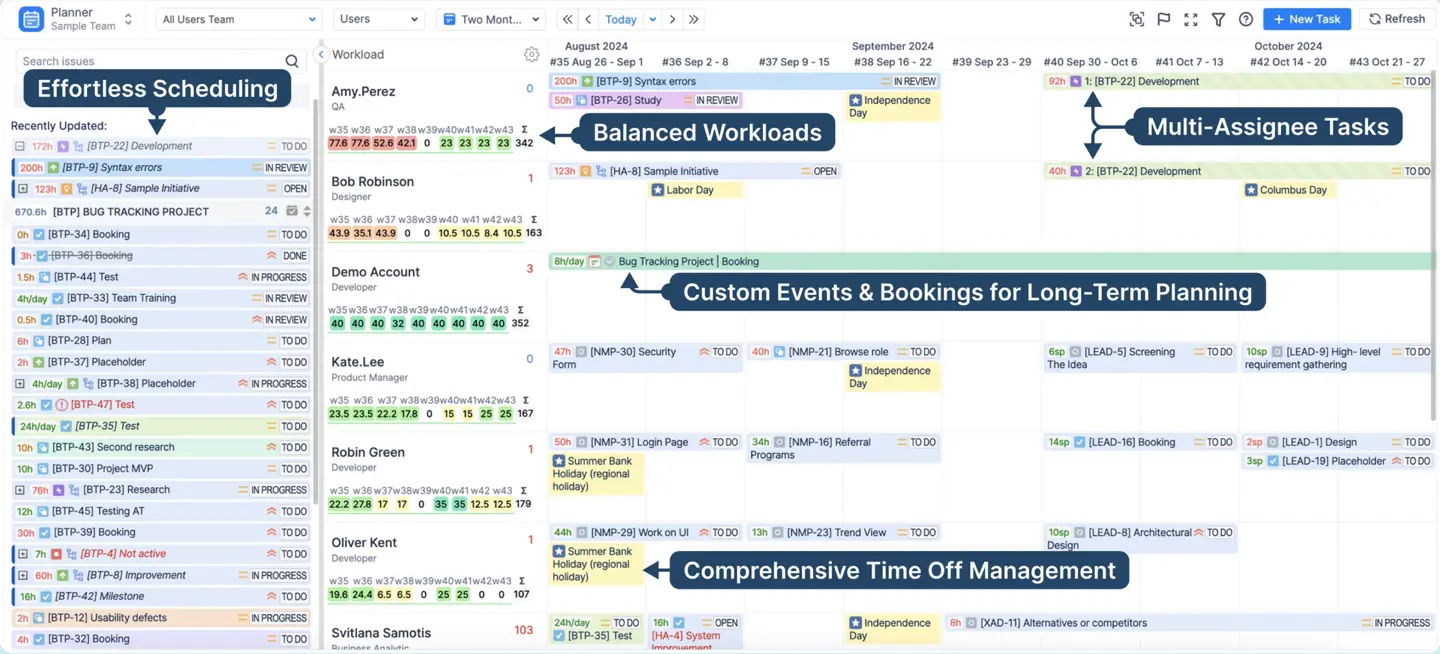
ActivityTimeline: The Resource-Centric Planner View
ActivityTimeline is a resource planning and time-tracking application designed to provide visibility across all projects and resources. It is the definitive solution for managers who prioritize team capacity and workload balance.
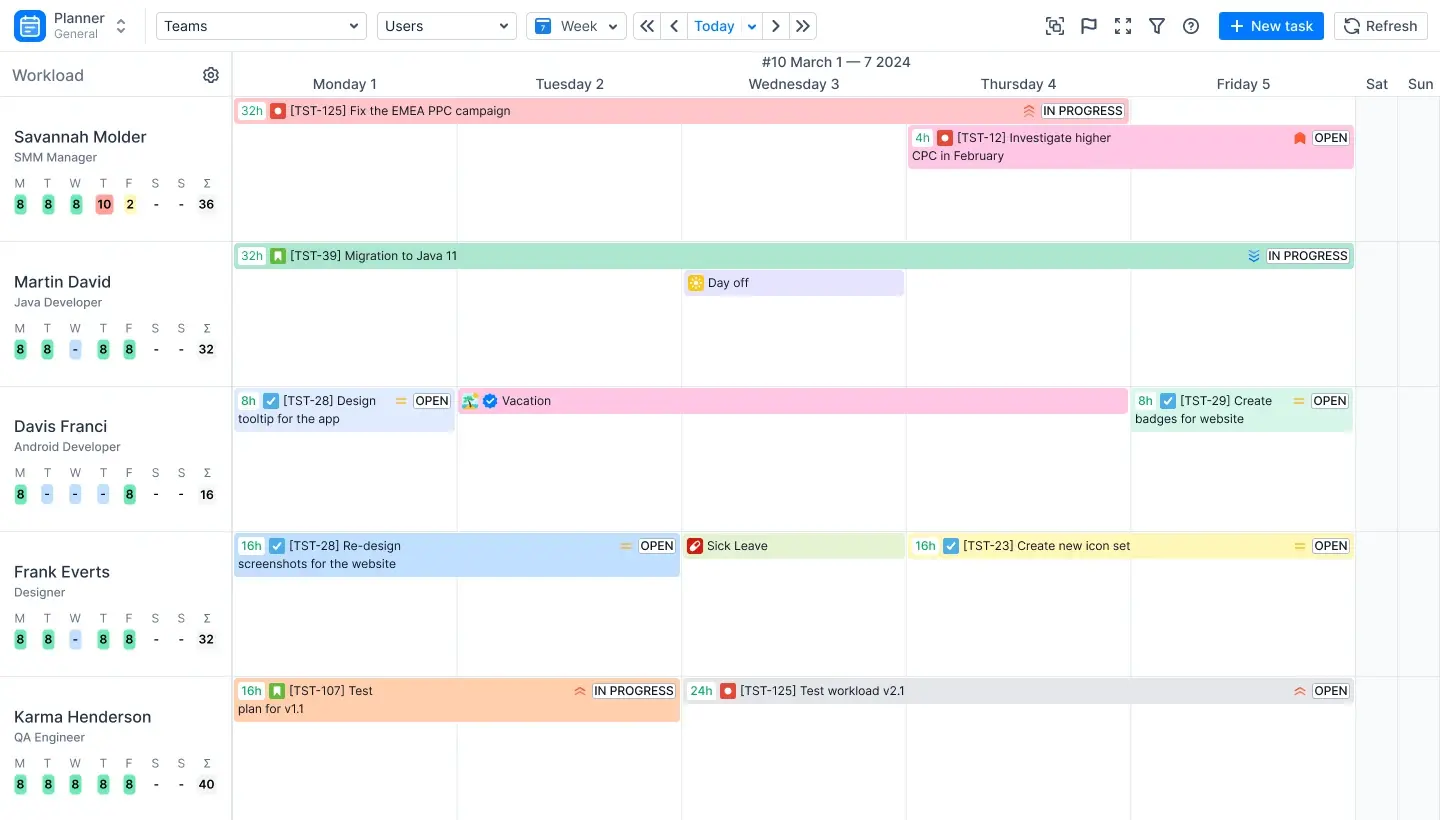
- Core Philosophy: AT places the “Resource” at the center of the timeline. Each row on the Planner Dashboard represents a person, not just a task.
- Workload Indicators: The system uses color-coded indicators (Green, Red, and Yellow) to show in real-time if a user is overloaded or underutilized based on their assigned Jira tasks. ActivityTimeline supports assigning tasks to both human and non-human resources, enhancing flexibility in resource management.
- Local Events: Unlike Jira, AT allows you to schedule non-Jira items like Vacations, Sick Leaves, Bookings, and Placeholders directly on the timeline.
- Multi-Level Planning: You can switch between “User” views for granular daily tasks and “Team” views for high-level delivery roadmaps. ActivityTimeline also facilitates resource allocation across teams and projects.
Standard Jira Roadmap (Jira Plans)
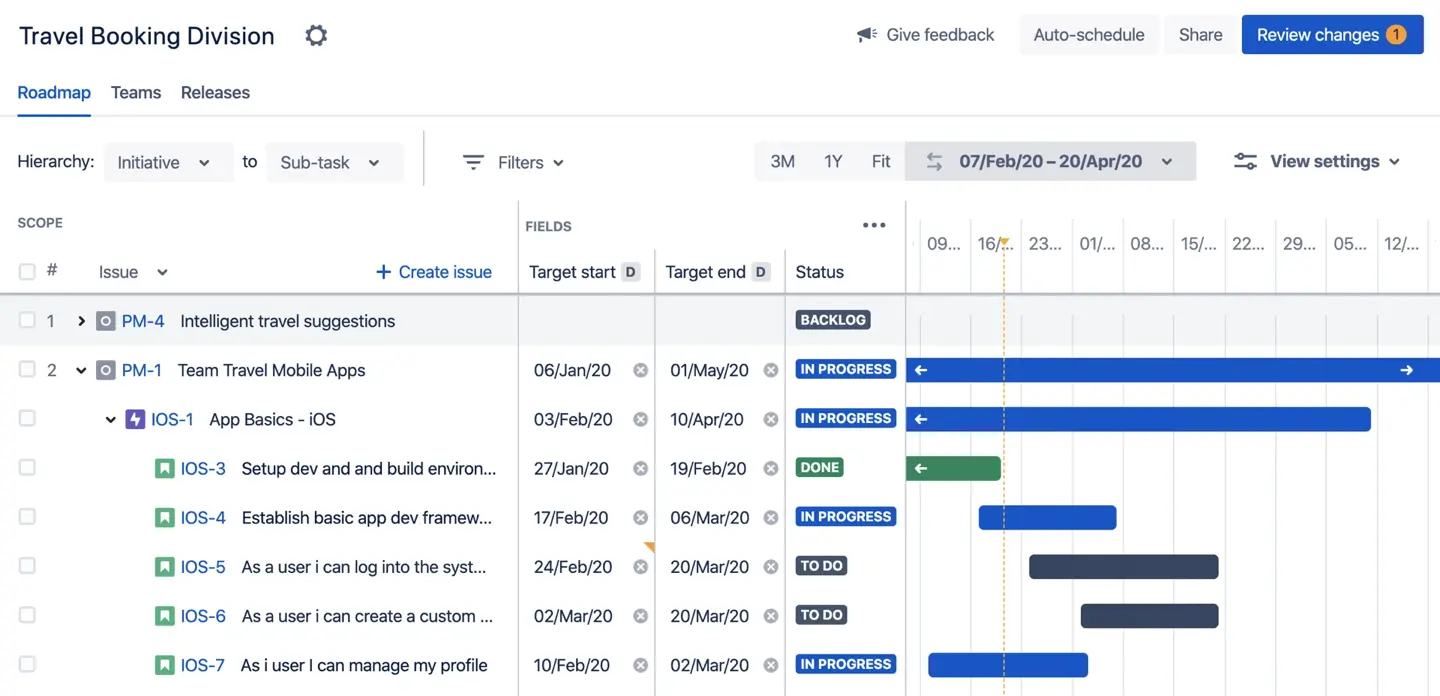
Jira Plans (formerly known as Advanced Roadmaps) is built for high-level project scheduling and cross-project roadmapping.
- Best For: Managers who need a “Big Picture” view of releases and versions across multiple projects, especially those who require custom hierarchies to tailor issue structures beyond standard epics for large-scale, multi-project planning.
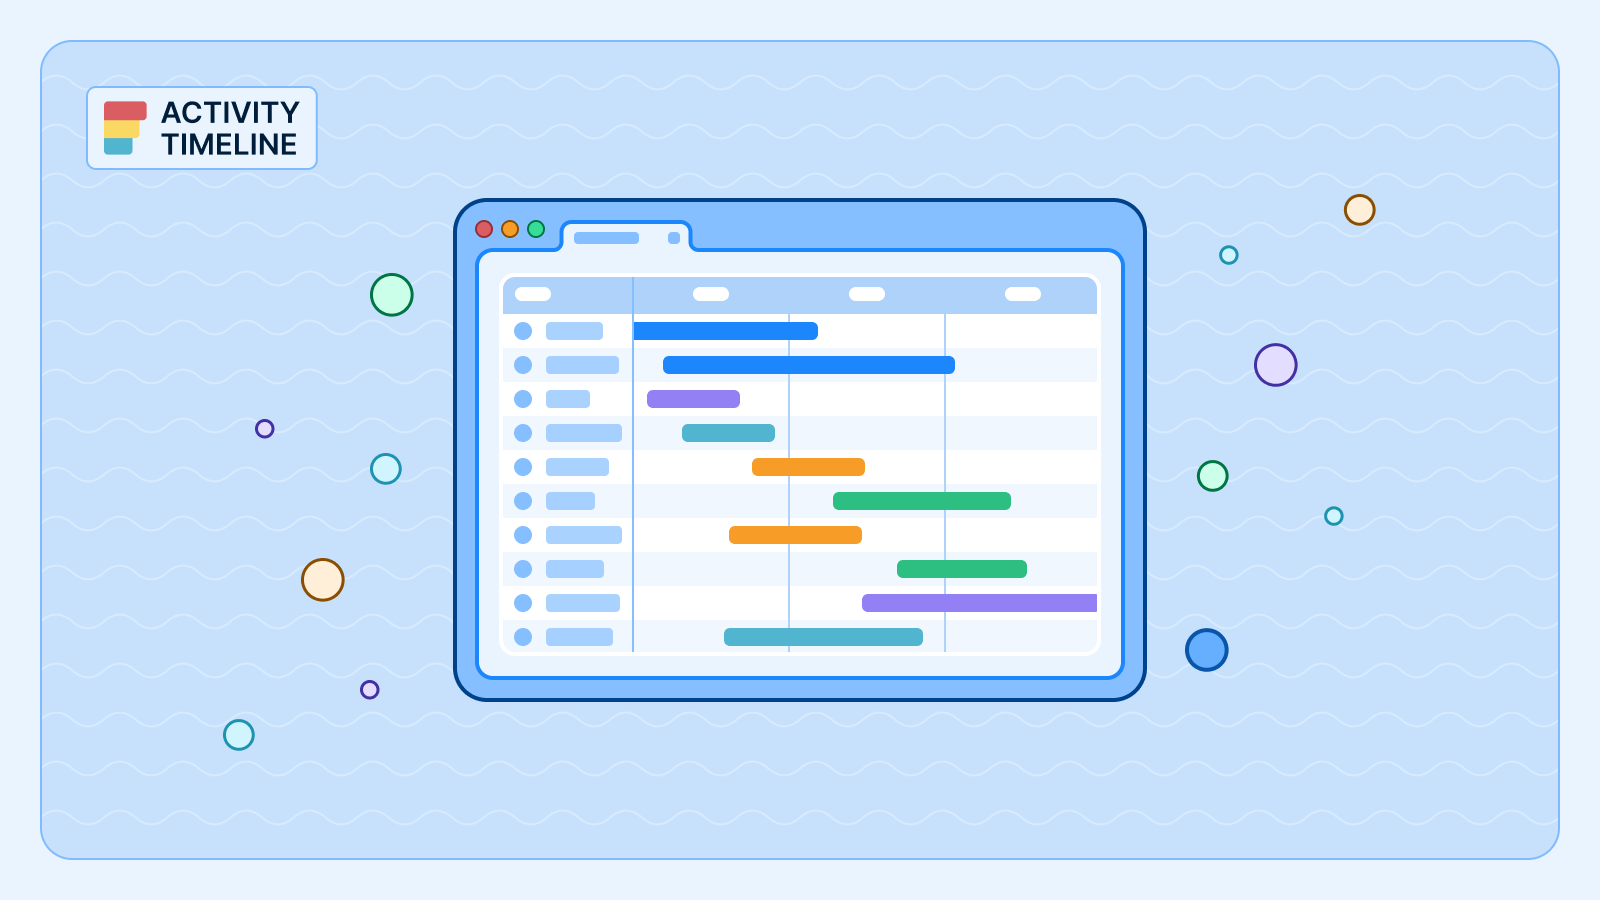
- Key Feature: It excels at showing dependencies with visual connector lines, making it ideal for standard Gantt chart needs, and includes scenario planning to model "what if" scenarios for better strategic planning.
- Limitation: It lacks the granular, person-by-person workload indicators and the ability to track non-work events like sick leaves directly on the schedule. Advanced features such as scenario planning and resource management require a Jira Premium subscription.
Advanced Roadmaps also allows for resource management and scenario planning.
Gantt Charts for Structure PPM
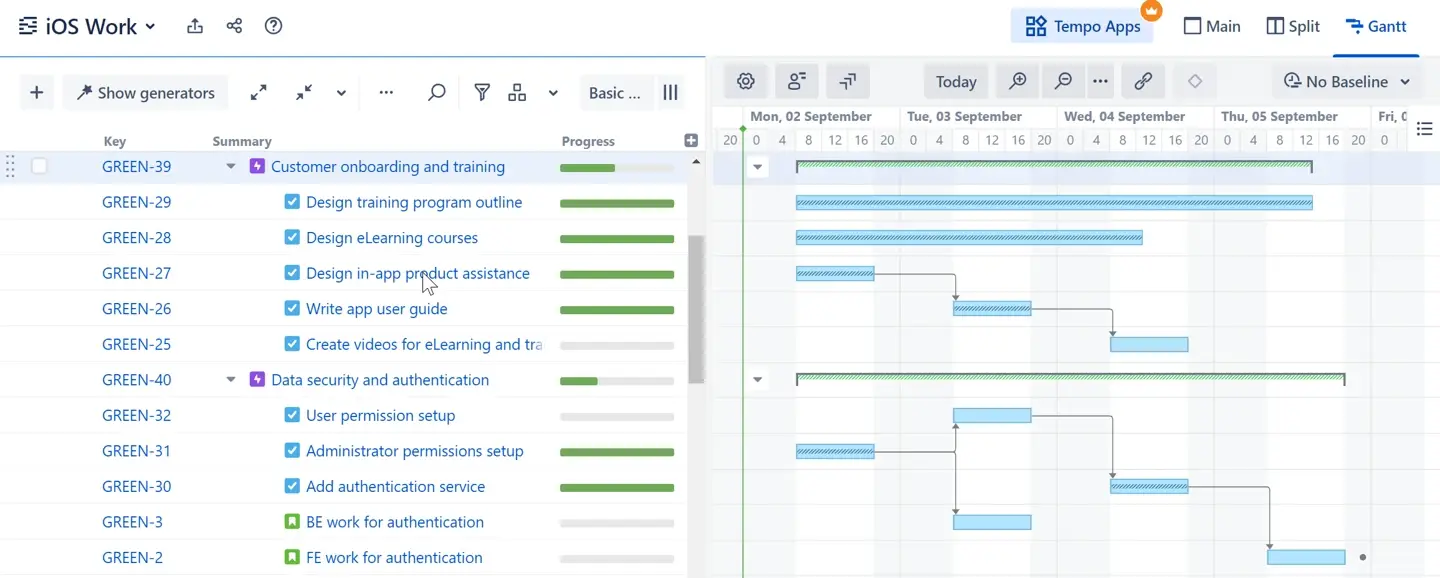
Structure is used for creating deep task hierarchies and managing complex data sets.
- Best For: Organizations that need to organize thousands of Jira issues into custom folders, levels, and hierarchies that Jira’s native “Epic-Story” parent-child relationship cannot handle.
- Key Feature: Flexible hierarchies that allow you to group work by any Jira field or attribute. Structure Gantt offers a planning view for rapid data entry and efficient modification of project details, and helps visualize and manage task relationships and dependencies for improved scheduling accuracy.
- Limitation: While powerful for task organization, it requires additional add-ons for Gantt visualization and can be complex to configure for simple resource capacity planning.
These Jira timeline tools also support project tracking by enabling teams to monitor progress, manage dependencies, and allocate resources efficiently. Additionally, project timeline templates help teams organize and sequence tasks within a clear chronological framework, from initial conception to final delivery.
Jira Product Discovery and Roadmap
Jira product discovery and roadmap features empower teams to plan, prioritize, and visualize the future of their projects. By creating a comprehensive project plan that outlines key milestones, deadlines, and objectives, teams can ensure everyone is focused on the same goals. The roadmap view in Jira allows you to break down complex projects into manageable tasks, set clear milestones, and visualize the path to completion.
Jira product discovery tools make it easy to gather feedback from stakeholders, prioritize tasks based on business value, and adjust your plan as new information emerges. This dynamic approach to planning helps teams create tailored roadmaps that reflect their unique needs, ensuring that every milestone and deadline is visible and achievable. By leveraging these features, teams can confidently plan, create, and execute projects that deliver real results.
How ActivityTimeline Solves the Capacity Gap
While Jira Plans and Structure are excellent for task organization, ActivityTimeline is the only tool that bridges the gap between planned work and actual execution. It also offers robust resource management capabilities, allowing teams to analyze capacity, allocate resources efficiently, and visualize resource workload across multiple projects.
ActivityTimeline calculates workload based on the estimated effort of tasks assigned to a resource within a specific timeframe. It uses two specialized algorithms to make these calculations, reducing manual work by automating workload distribution and capacity analysis:
- Balance Mode: Evenly distributes hours for a set period, ideal for long-term projects like marketing campaigns.
- Liquid Mode: Full-utilization mode that places hours upfront to show the earliest possible completion date, perfect for software development sprints.
This ensures that when you drag a task onto a team member’s timeline, you aren’t just assigning a ticket—you are assigning individual tasks and validating that they have the actual hours available to finish it.
Visualizing task relationships through a project timeline template helps teams predict delays, allocate resources accordingly, and take proactive measures to prevent issues from escalating.
Project Size and Structure: Matching Tools to Your Project Complexity
Selecting the right project management tools depends heavily on your project’s size and structure. For smaller projects with straightforward requirements, a basic timeline view in Jira may be all you need to track progress and manage dependencies. These simple tools provide a clear overview of tasks and deadlines, making it easy to keep your project on schedule.
However, as projects grow in complexity—spanning multiple teams, intricate dependencies, and numerous deliverables—more advanced roadmapping tools become essential. By matching your toolset to your project’s complexity, you can ensure effective project management, streamline collaboration, and maximize productivity, no matter the size or scope of your initiative.
How to Configure a Balanced Team Timeline
To get the most out of a resource-centric view, you must set up your team’s capacity correctly. Group timeline views help visualize and organize project schedules by team, user, or project, making it easier to manage resources and gain a clear portfolio overview. Follow these expert-level steps to transform your planning.
- Define your team members and their roles.
- Assign tasks based on skill sets and availability.
- Set start and end dates for each task to ensure timely delivery and effective scheduling.
- Monitor workload distribution and adjust as needed.
A project timeline template allows teams to visualize task ownership and track progress in real time, increasing accountability and transparency.
Step 1: Define User Capacity and Involvement
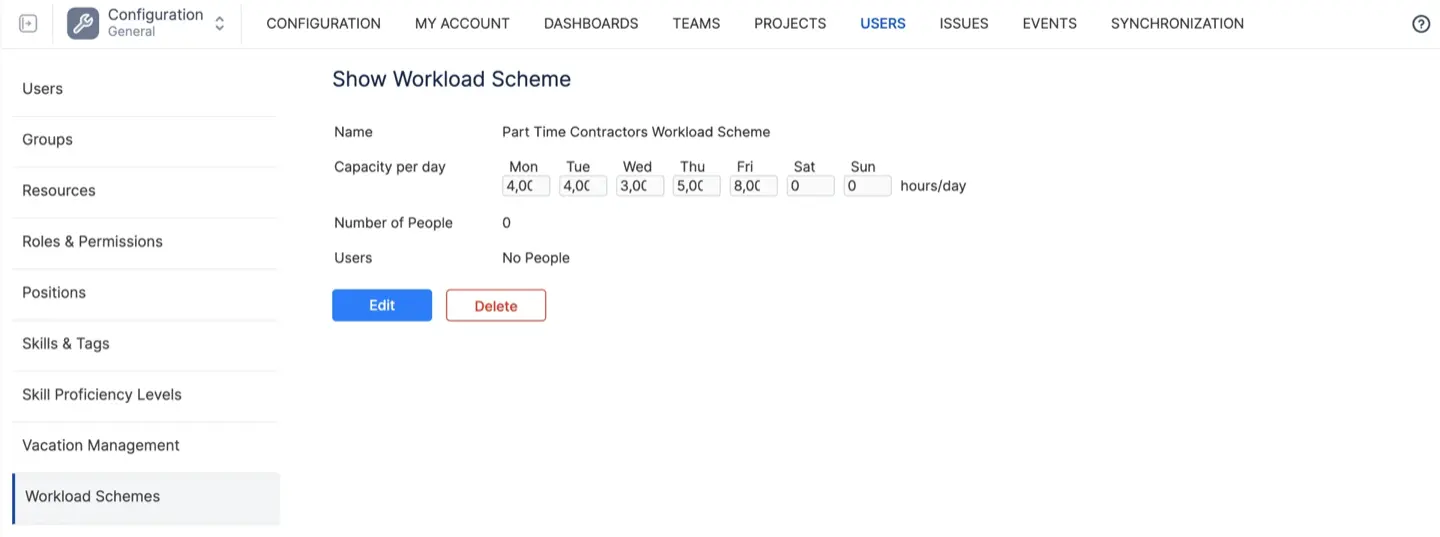
Before scheduling work, you must tell the system how many hours each person is available.
- Navigate to Configuration → Users.
- Click on a user’s name to open their User Employment profile.
- Set the Standard Capacity (e.g., 8.0 hours/day).
- Optionally, use Workload Schemes to account for part-time employees or different time zones.
Step 2: Establish a Holiday Scheme
To prevent scheduling errors during office closures, you must apply a holiday scheme.
- Go to Configuration → Teams → Holiday Schemes.
- Click "Create new scheme" and select your team’s country.
- The system will automatically populate public holidays, which will now appear as "greyed out" non-working days on your Planner.
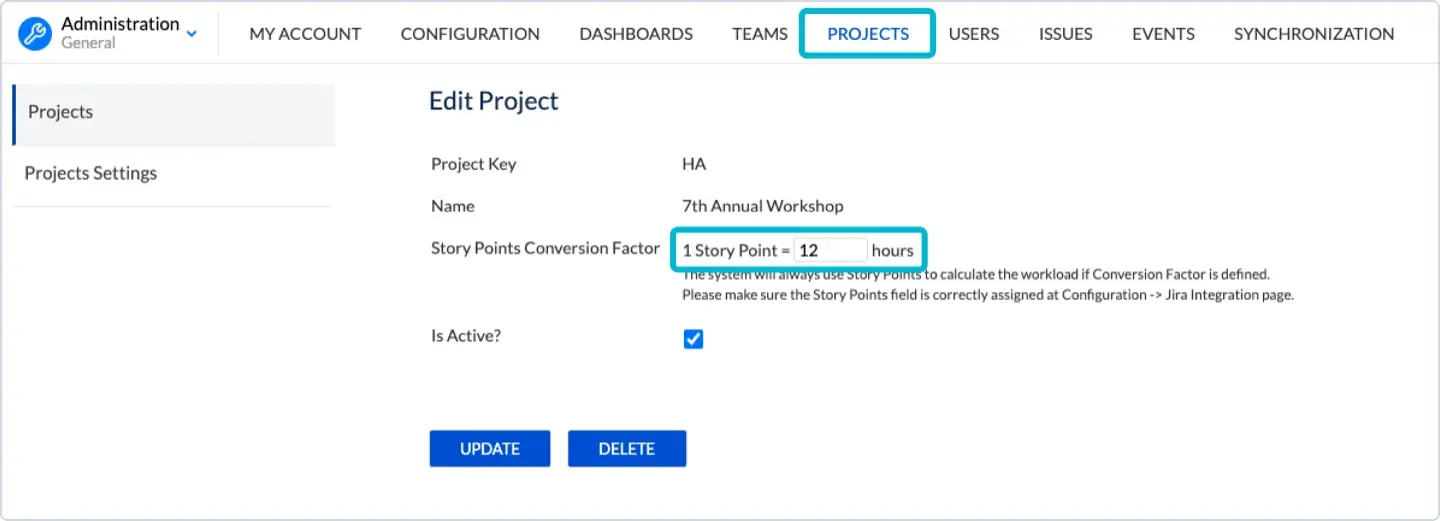
Step 3: Synchronize Jira Estimates
For the Workload Indicator to function, your Jira issues must have estimates.
- Ensure your Jira tasks have values in the Original Estimate or Story Points fields.
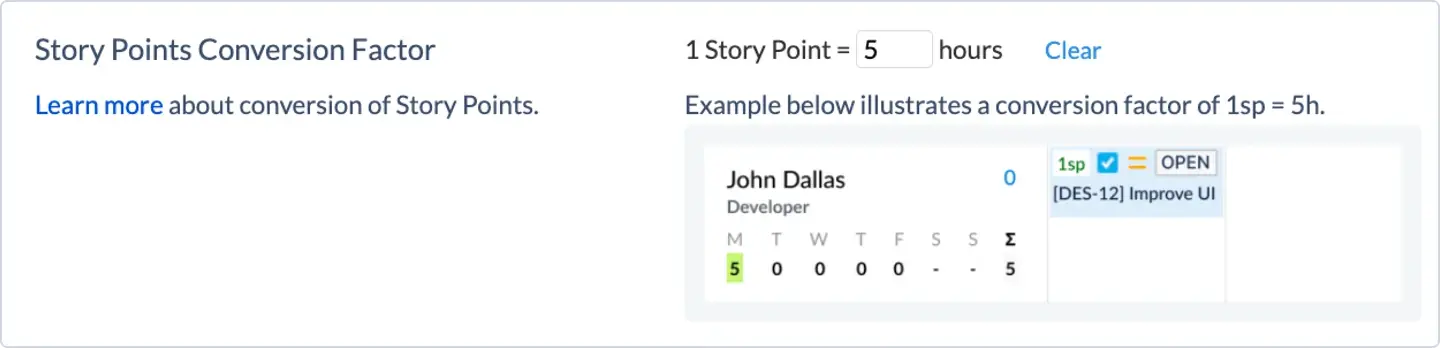
- In ActivityTimeline, go to Configuration → Projects and define your Story Points Conversion Factor (e.g., 1 SP = 8 hours) to ensure the workload indicators are accurate.
- Perform a Full Issue Synchronization to cache the latest data from Jira.
Step 4: Visual Rescheduling on the Planner
Now, you can resolve conflicts with a simple drag-and-drop interface.
- Open the Planner Dashboard.
- Identify any users with a Red Workload Indicator, signifying they are overloaded.
- Click and drag the edge of a task bar to resize it, spreading the work over more days to reduce the daily load.
- Alternatively, drag the task from an overloaded user to a user with a Yellow or Light Green indicator (underutilized) to balance the team’s effort.
Where to Find Help and Best Practices
Navigating the world of Jira project management is easier with the support of the Atlassian community and its extensive resources. The Atlassian community is a vibrant hub where users share insights, ask questions, and exchange best practices for using Jira and related tools. ActivityTimeline also offers a Help Center to navigate any challenges you may encounter.
In addition to peer support, Atlassian provides comprehensive documentation, step-by-step tutorials, and webinars to help teams master Jira’s features and implement effective project management strategies. By tapping into these resources, teams can overcome challenges, stay up to date with the latest best practices, and ensure their projects are set up for success.
Conclusion: Take Control of Your Project Trajectory
Understanding the difference between the best Jira timeline tools is the first step toward project mastery. While Jira Roadmaps and Structure are excellent for high-level overviews and complex hierarchies, they cannot replace the people-first visibility of ActivityTimeline.
By implementing the resource-centric Planner view, you empower yourself to make data-driven decisions that protect your team from burnout and guarantee accurate delivery dates for your stakeholders. ActivityTimeline doesn’t just show you what work needs to be done—it shows you how your team is actually doing it. Additionally, 'what if' scenario planning features allow you to evaluate different project outcomes and resource allocations without impacting live data, supporting better risk management and strategic planning.
{{rich-cta-2}}